The OmniLatin Tool
The OmniLatin Tool is an Opensource RoboFont Extension developed by Sharp Type in January 2025. This page is here to guide the designers through each step of the process of designing a typeface with OmniLatin support.
The OmniLatin Tool is an Opensource RoboFont Extension developed by Sharp Type in January 2025. This page is here to guide the designers through each step of the process of designing a typeface with OmniLatin support.
→ Download the extension on Github
→ Available on Mechanic 2
→ Download the extension on Github
→ Available on Mechanic 2
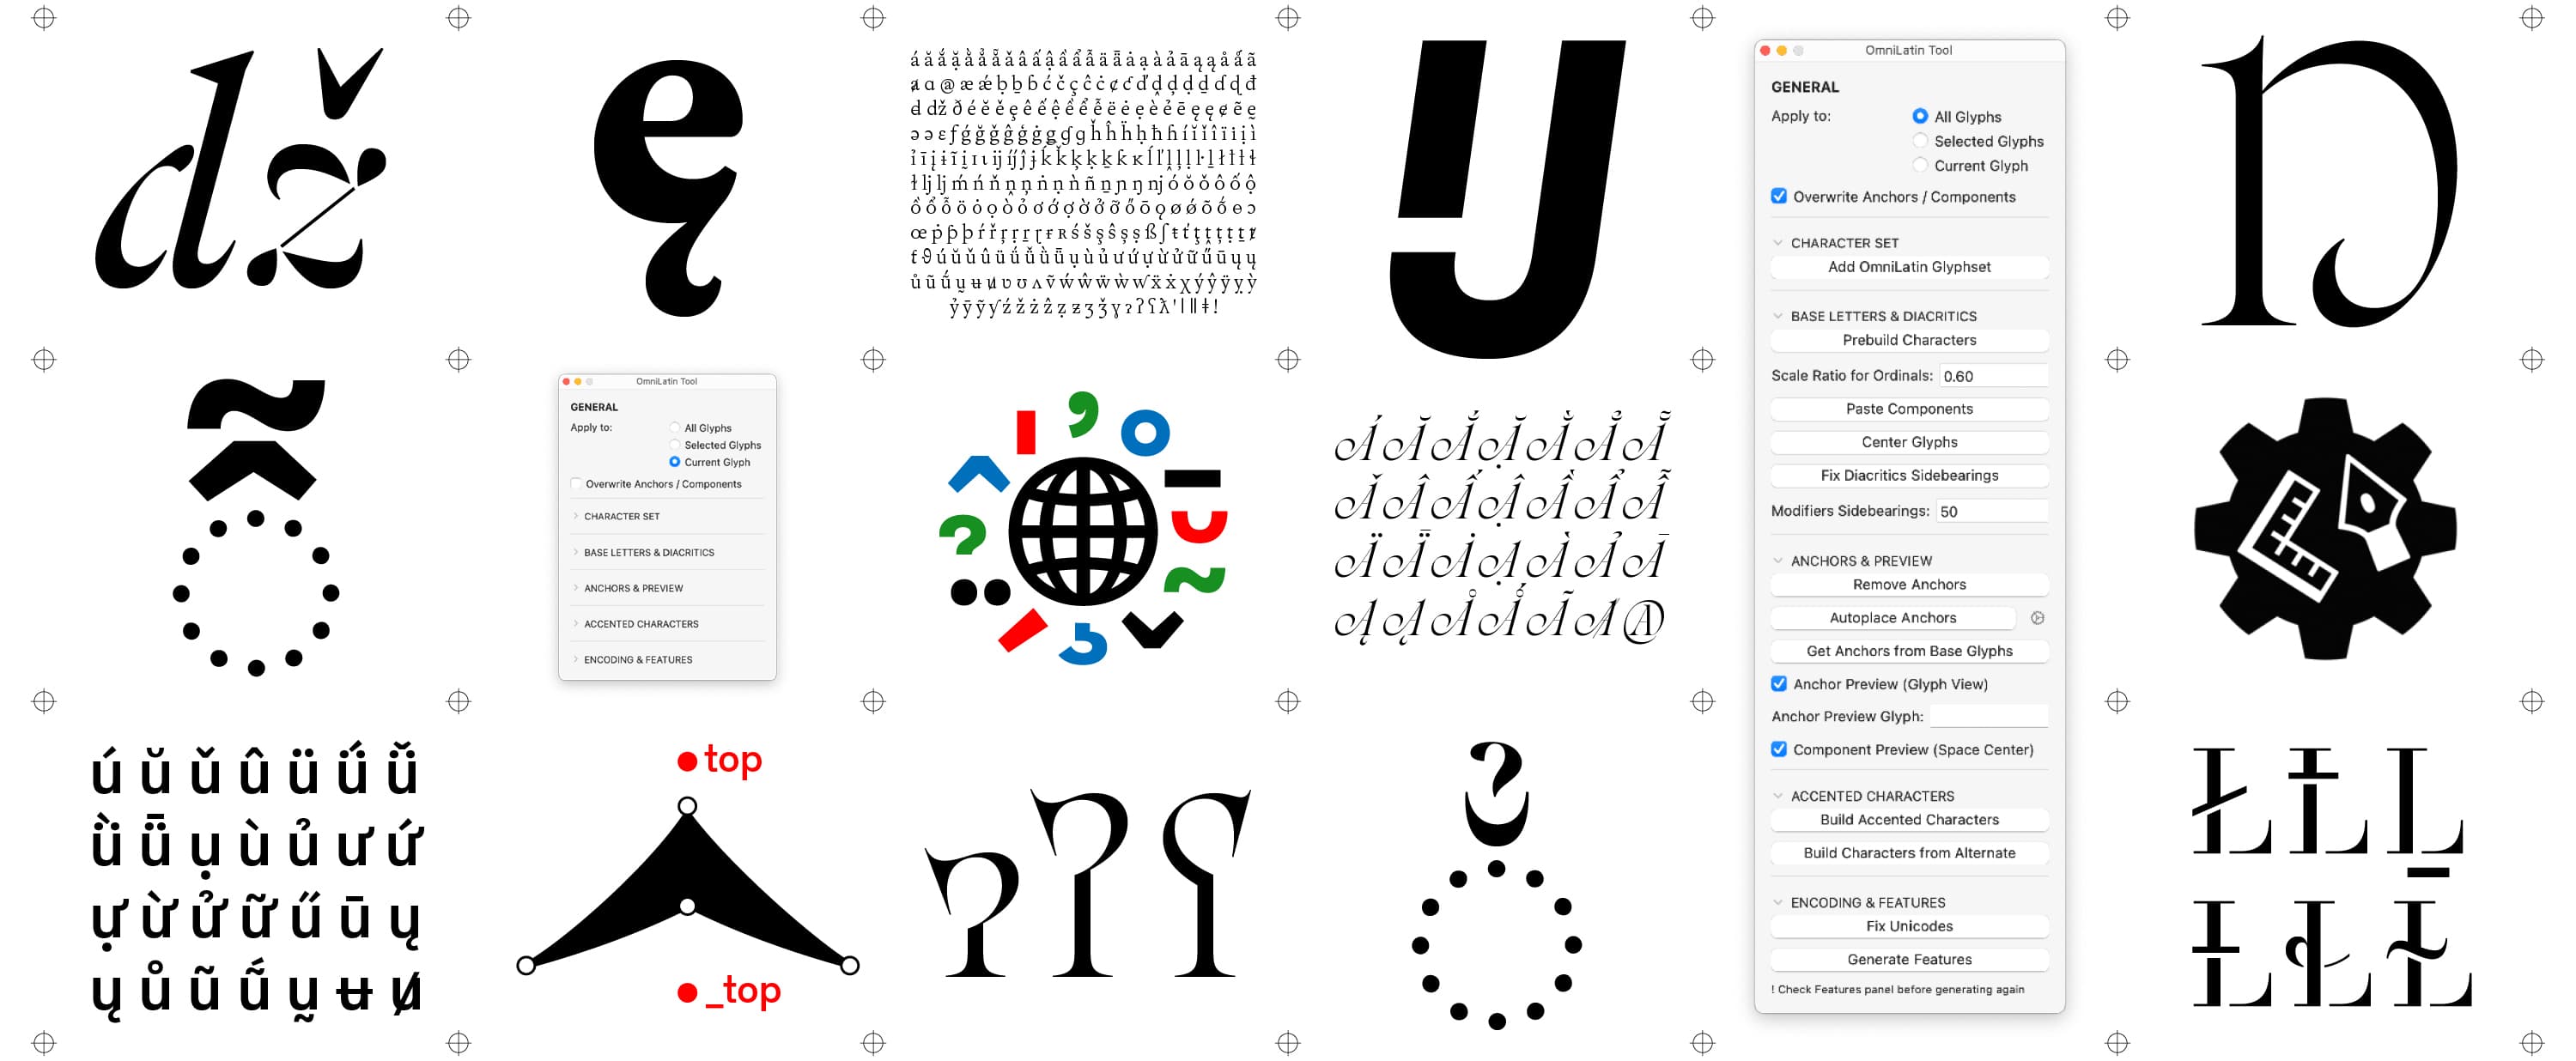
The Interface
The Interface
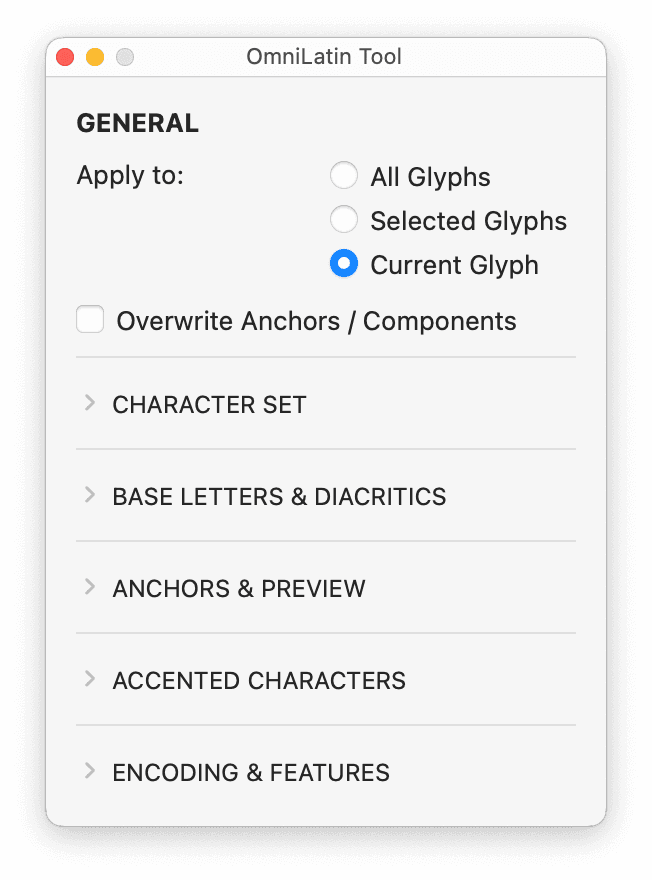
The interface is made of a GENERAL section and five accordions.
The GENERAL allows you to choose on which glyphs you want to apply the actions done by the buttons of the tool. The description of the actions of each button is on the Github page.
Note: Be very careful if you choose All Glyphs and Overwrite! By default, the selection is set to Current Glyph and doesn't overwrite existing contours or anchors.
Step One: Add the OmniLatin Character set
Step One: Add the OmniLatin Character set
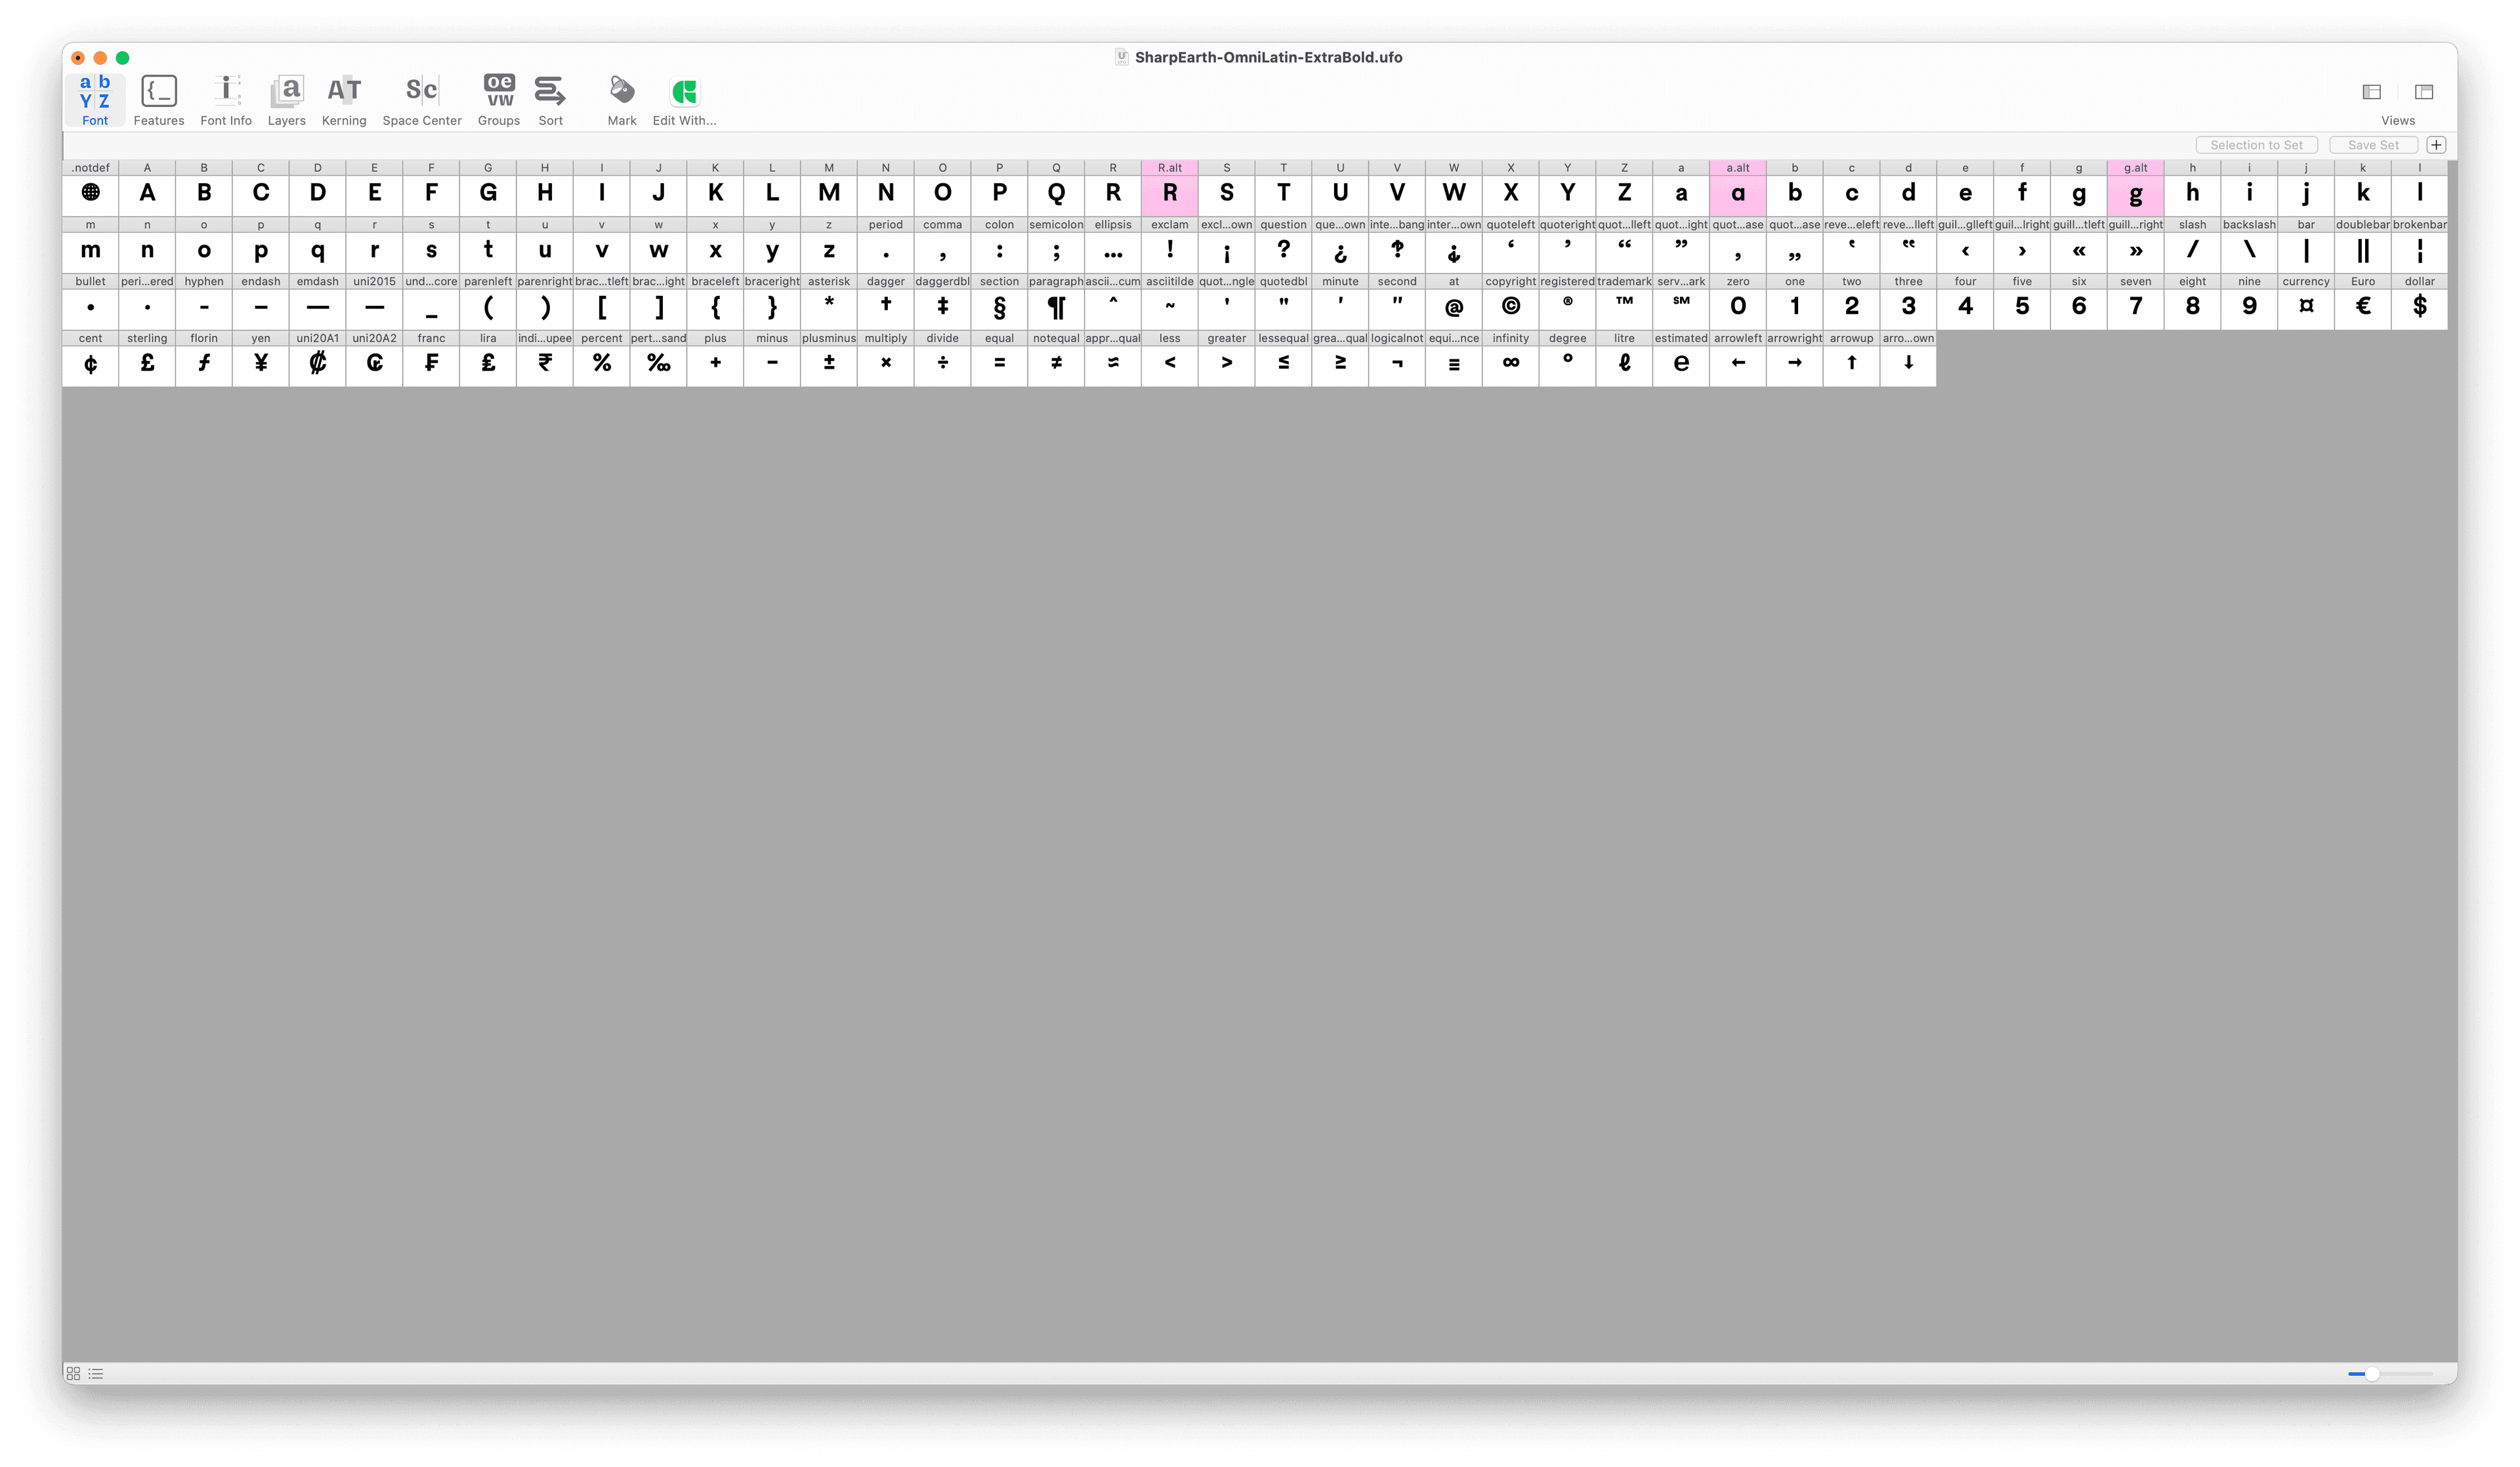
Adding the OmniLatin character set to your font implies that the design of the basic glyphs is already done and definitive. We suggest to have already A to Z, a to z, 0 to 9, some punctuation, and maybe some diacritics.
You can read more about how we have determined the OmniLatin character set in this complimentary article: The OmniLatin Research.
Step Two: Designing the Special Characters
Step Two: Designing the Special Characters
The Special Characters
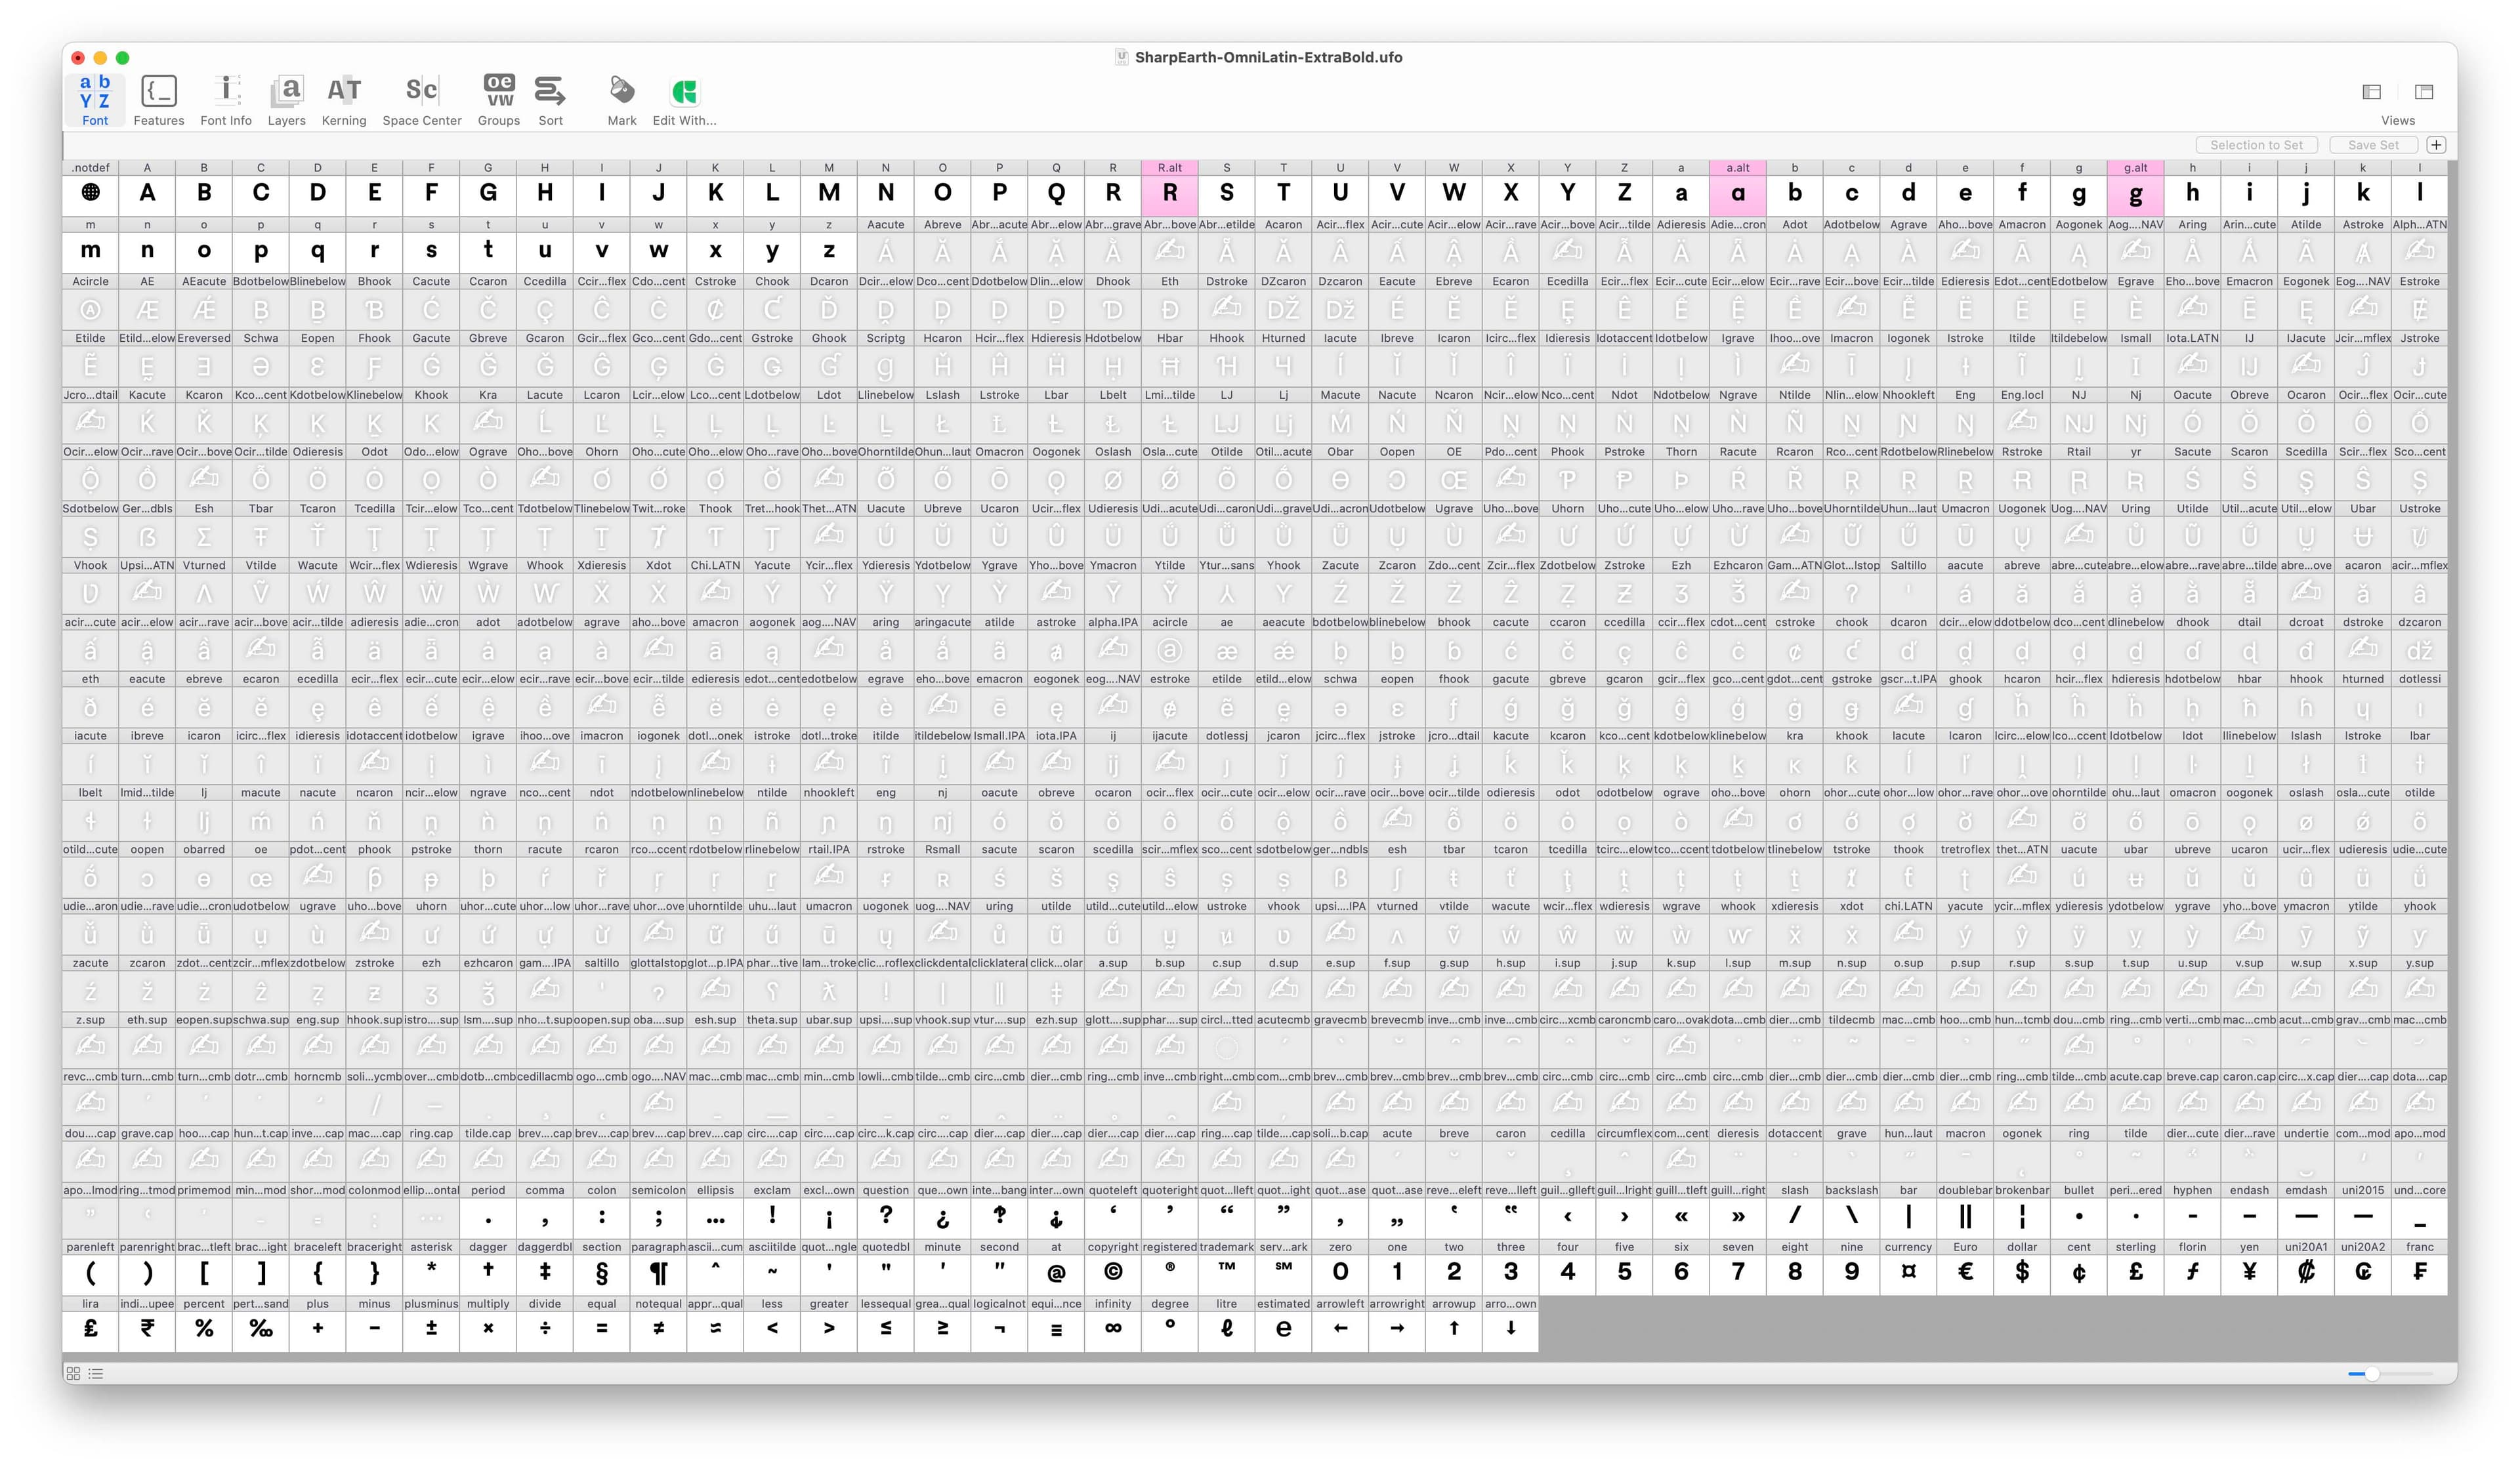
There are many glyphs that need to be drawn manually, we are calling them the Special Characters. To help you to draw these new letters, you can use the PREBUILD CHARACTERS function. It will copy-paste and decompose other characters that can serve as reference. The glyphs from this category will have a red mark color.
EX : A + E to help you design Æ
We have compiled below some references from the fonts we’ve designed: Sharp Earth, Sharp Serif Text and Display and Rosalie.
Step Three: Designing the Diacritics
Step Three: Designing the Diacritics
For OmniLatin support you will need to prepare three four sets of diacritics and modifiers: the cmb, the cmb double, the .cap and finally the modifiers.
Note: if you have already designed diacritics in the standard glyph boxes move your drawing into to the cmb boxes.
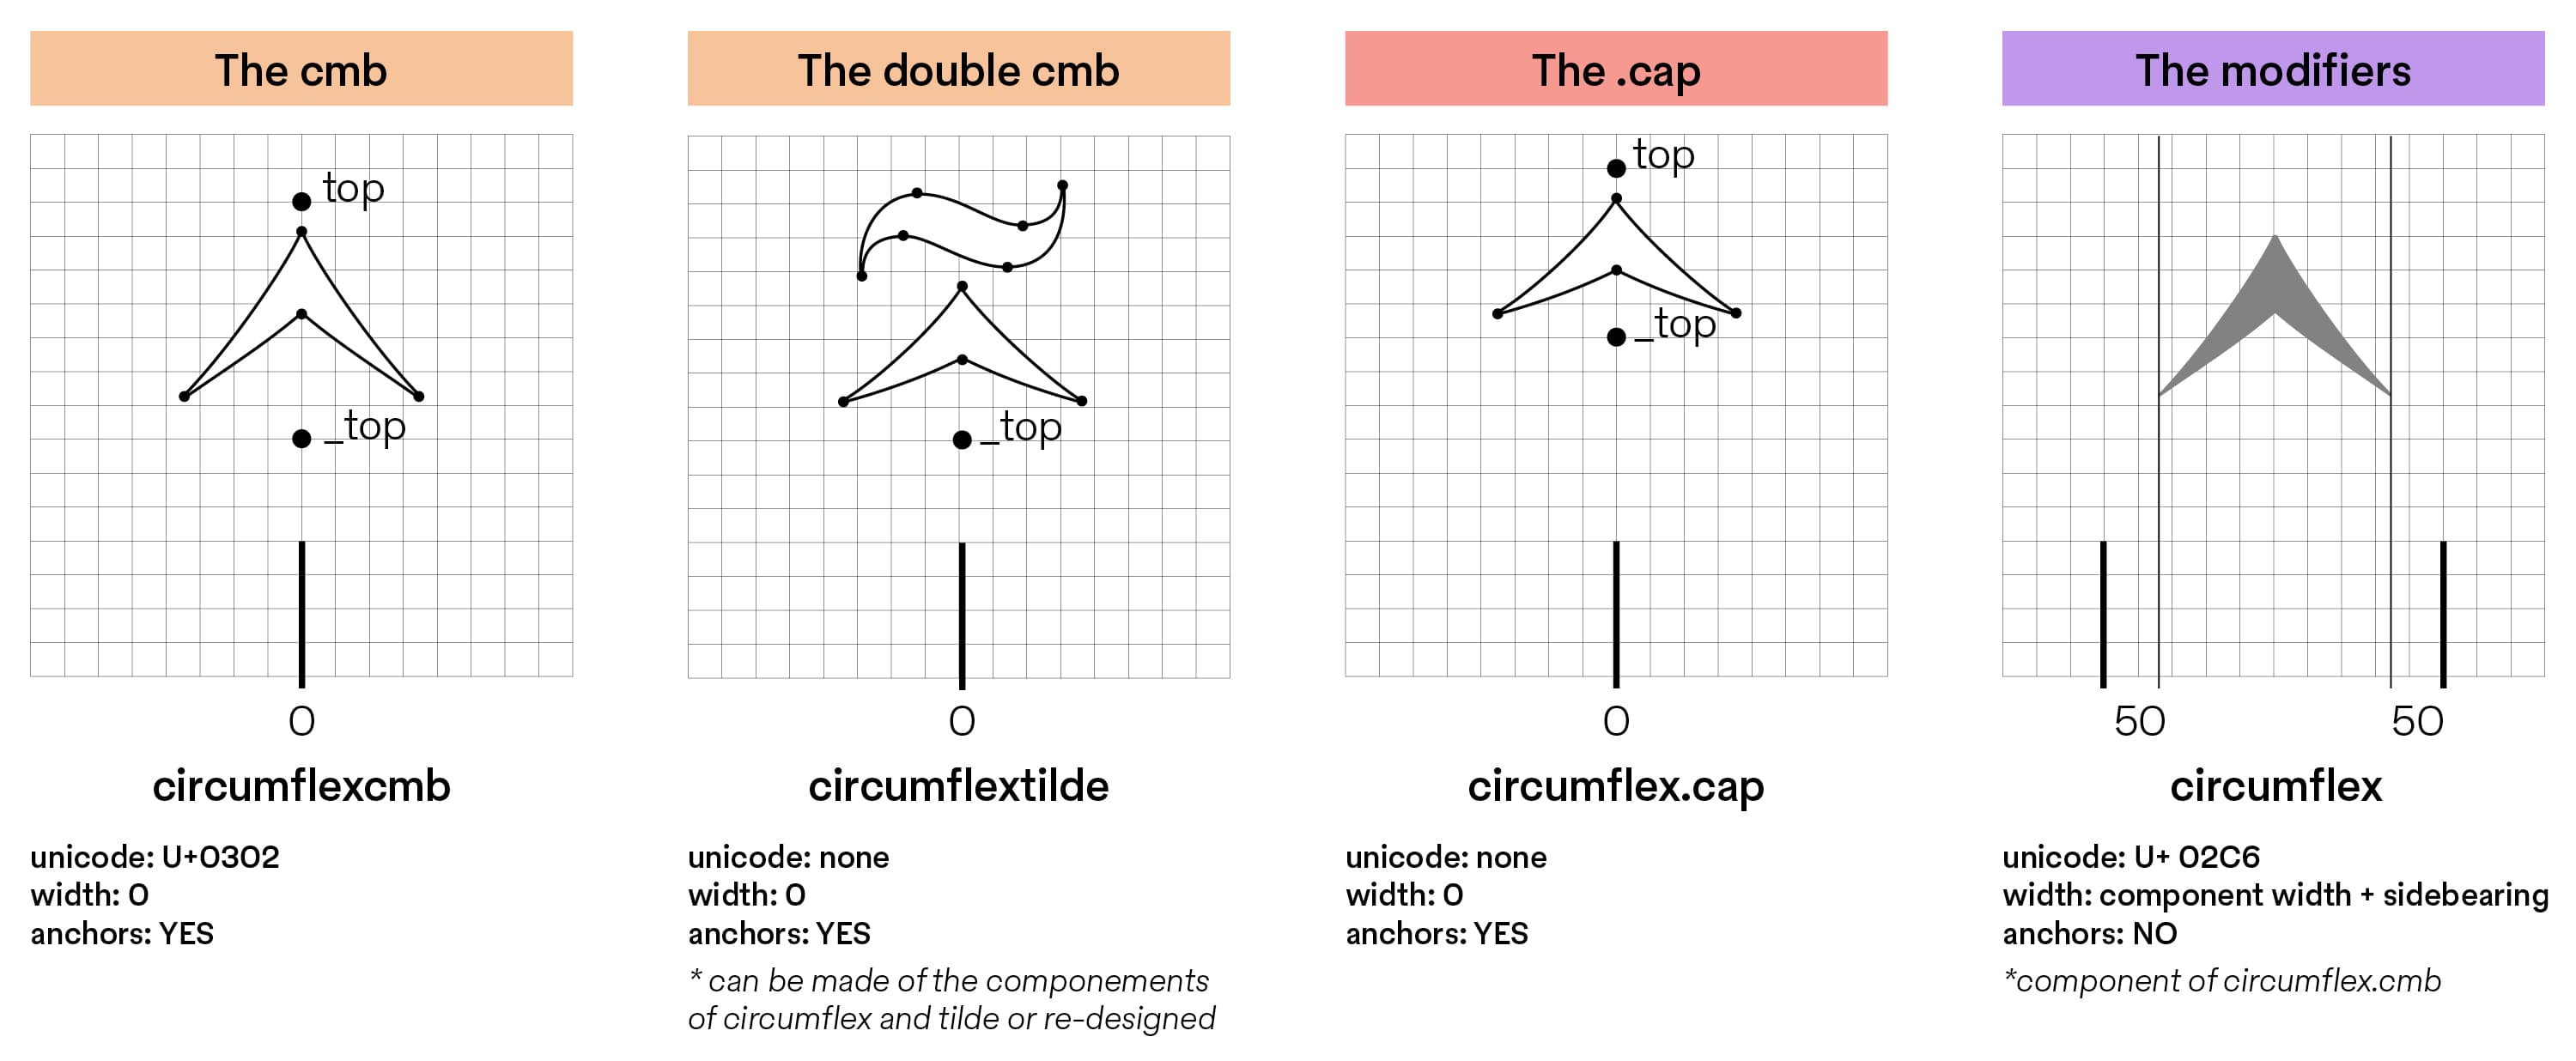
1 -The cmb (e.g.: acutecmb)
Those contains the original design, it will be used to build all the accented characters and by the mark to mark system. They have anchors, unicode but zero width. The tool already contains all this information.
2 - The cmb double (e.g.: circumflexacutecmb)
They are made of two different diacritics. They have zero width, no unicode but they do have a _top anchor.
3 - The .cap (e.g.: acute.cap)
Those one are optional but recommended. They have zero width, no unicode but they do have anchors.
Note: The standard practice is to have a different set of diacritics for top-accented uppercase. They are often lower and wider, to avoid going too high and necessitating a looser leading.
4 - The modifiers (e.g.: acute)
They can be components of the cmb. They have no anchors, but they do have a unicode and a width. We have preset the left and right sidebearings to be 50 but you can change that in the text field.
Note: they are used to previsualize diacritics but not as components for accented letters.

Here the list of the buttons that can help you build the diacritics:
→ Draw the cmb diacritics manually. Some can be prebuild with PREBUILT CHARACTERS (e.g.: hungarhumlautcmb = 2× acutecmb). All the .cap diacritics can be prebuild with this function too.
→ You can build the double cmb accents with BUILD ACCENTED CHARACTERS. It will stack them using their top anchor. Adjust their placement and feel free to decompose and adjust the design.
→ PASTE COMPONENTS will copy the cmb marks in the modifiers glyphs.
→ AUTOPLACE ANCHORS will place the anchors where they have been preset.
Note: We advise you to check and correct the placement manually.
→ FIX DIACRITICS WIDTH will set the zero width for the cmb marks and have the anchors and glyph centered on the zero axis. It will also add the sidebearings value set in the textfield below to the modifiers.
→ Once they are all drawn and you are satisfied you can hit the button FIX UNICODE to get the correct unicode to each of them.
Step Four: Placing the anchors
Step Four: Placing the anchors
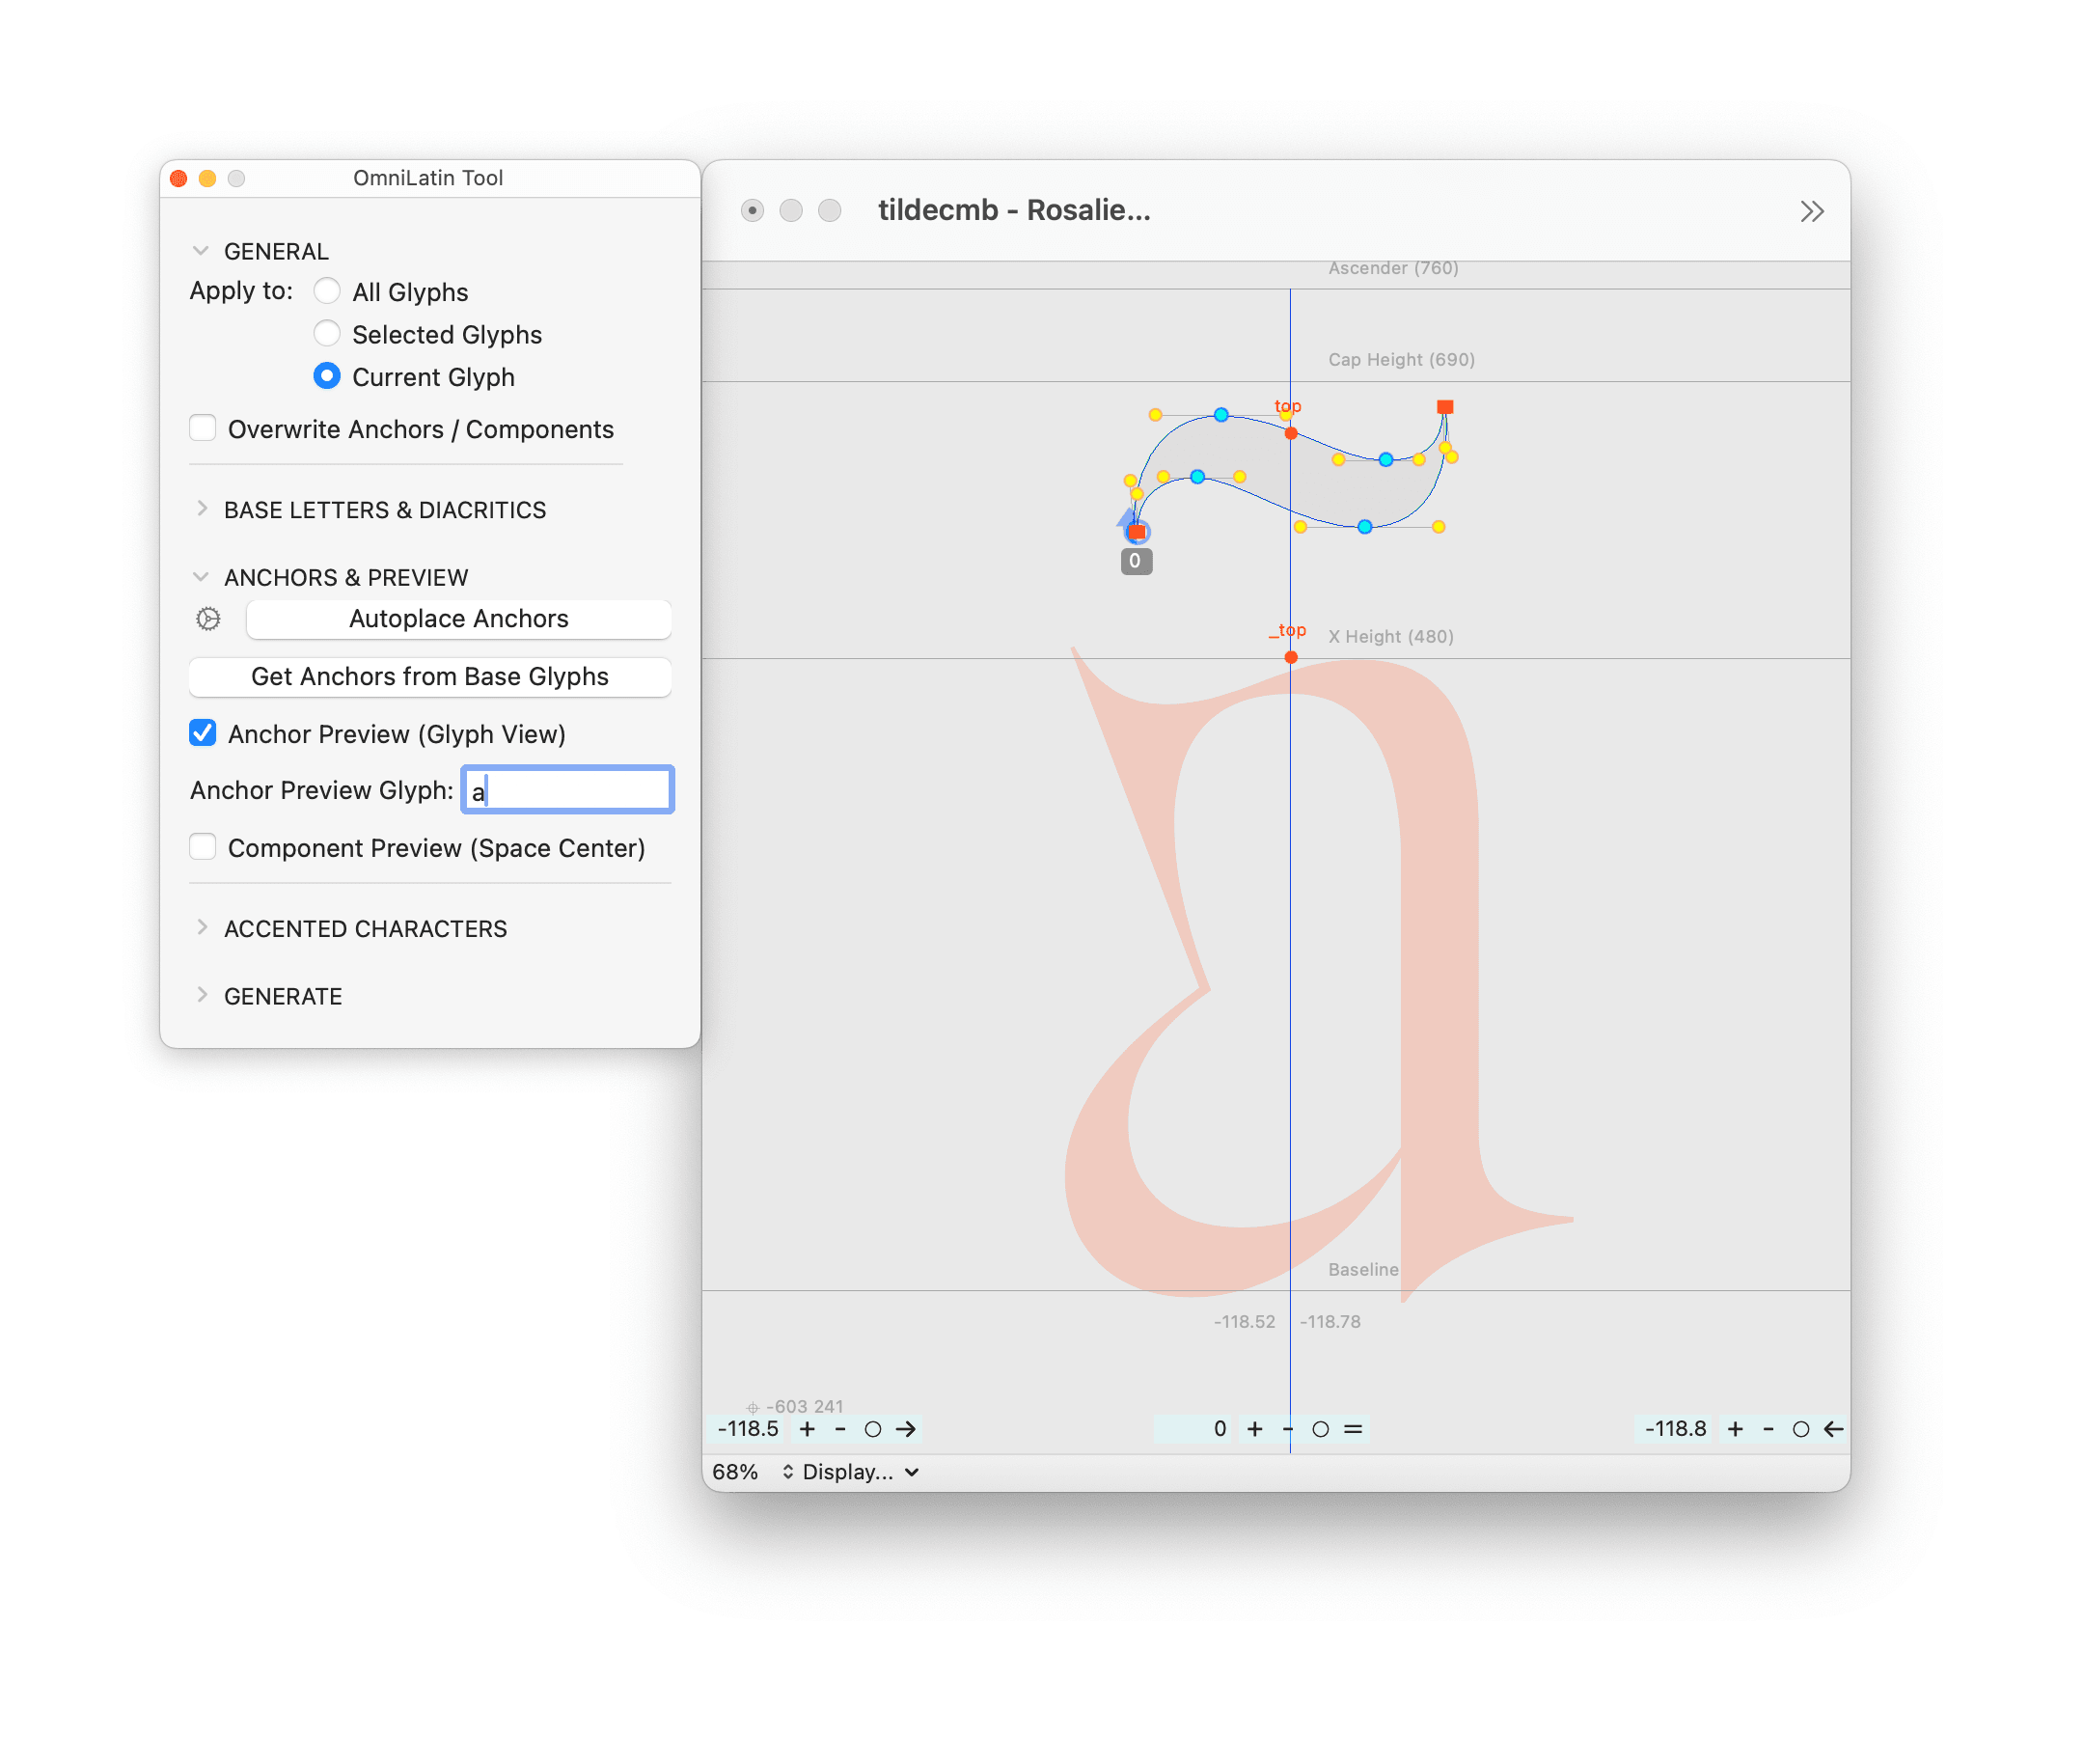
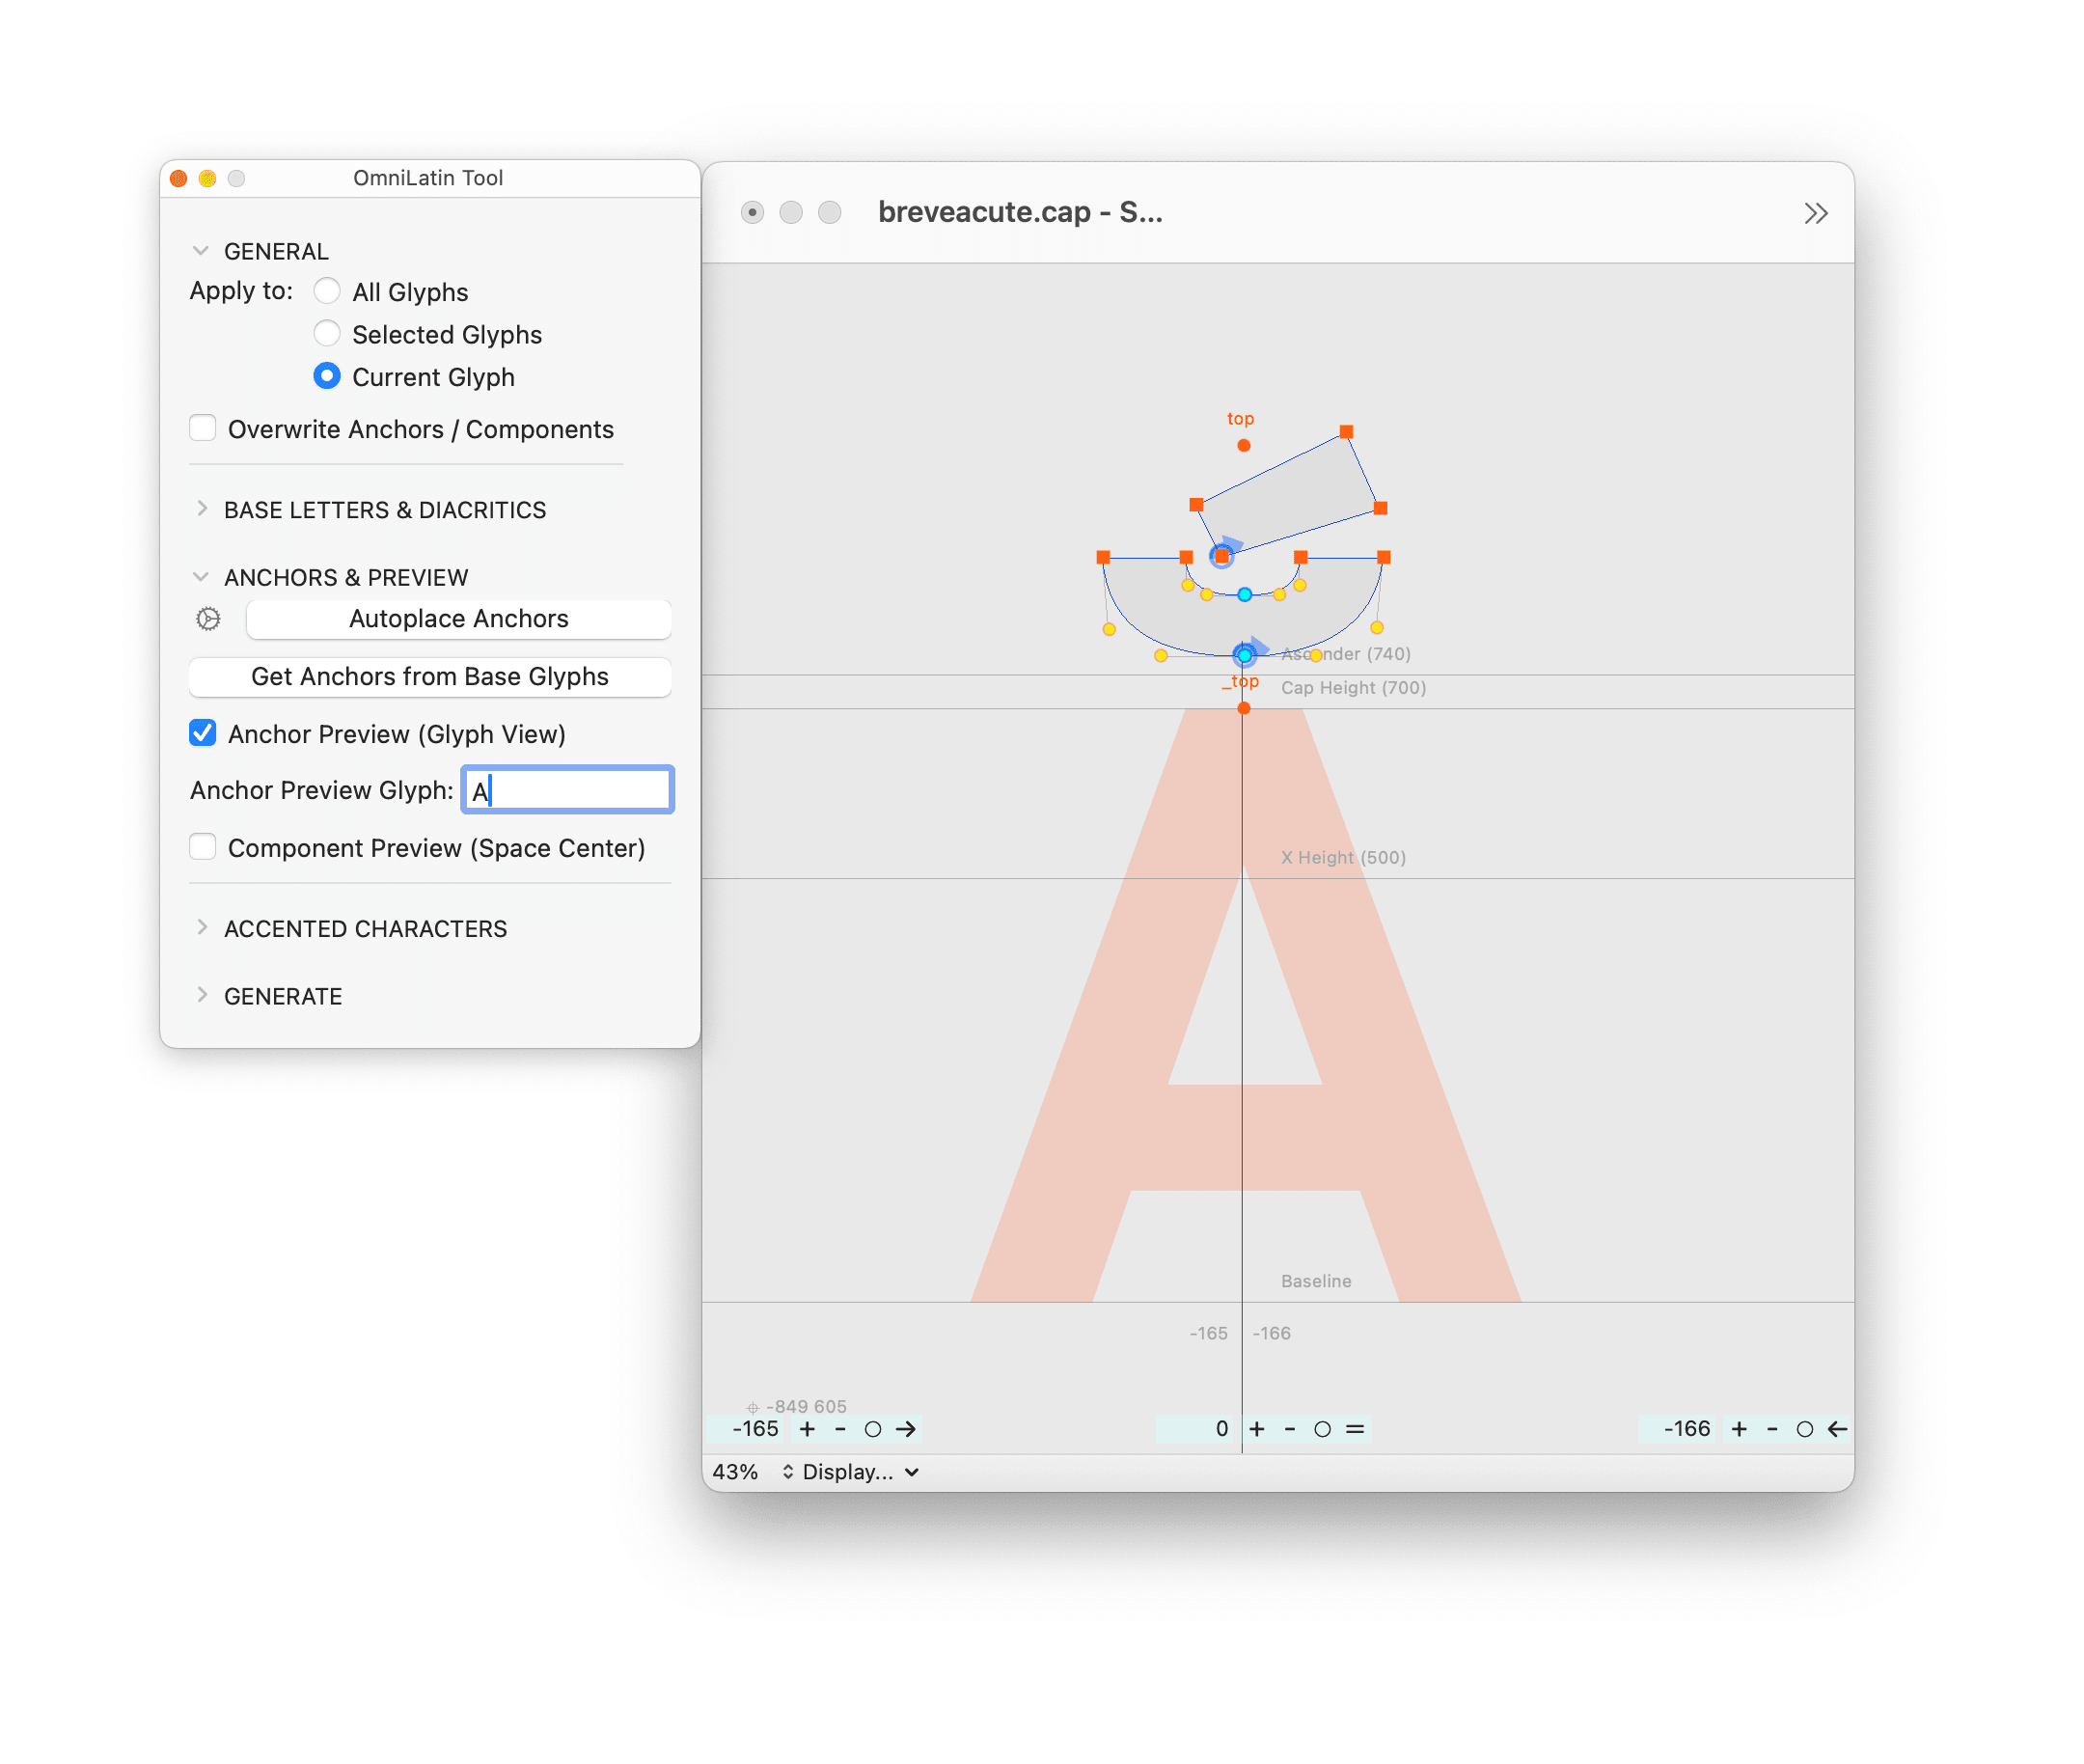
Before building the accented characters, all the letters (A-Z, a-z + special characters) and the diacritics need anchors. The tool contains the list of all the needed anchors for all the glyphs of your font, just hit the AUTOPLACE ANCHORS button.
The anchors are placed at the mathematical center and the closest metric line, they all need to be checked and moved manually to their rightful place.
To help you pre-visualize your design you can check the ANCHOR PREVIEW (Glyph View) and you can even select the character you favor.
Note: if you don't precise the letters in the text field, you will see a stack of letters for the _top anchor and a stack of accents for the top anchors.
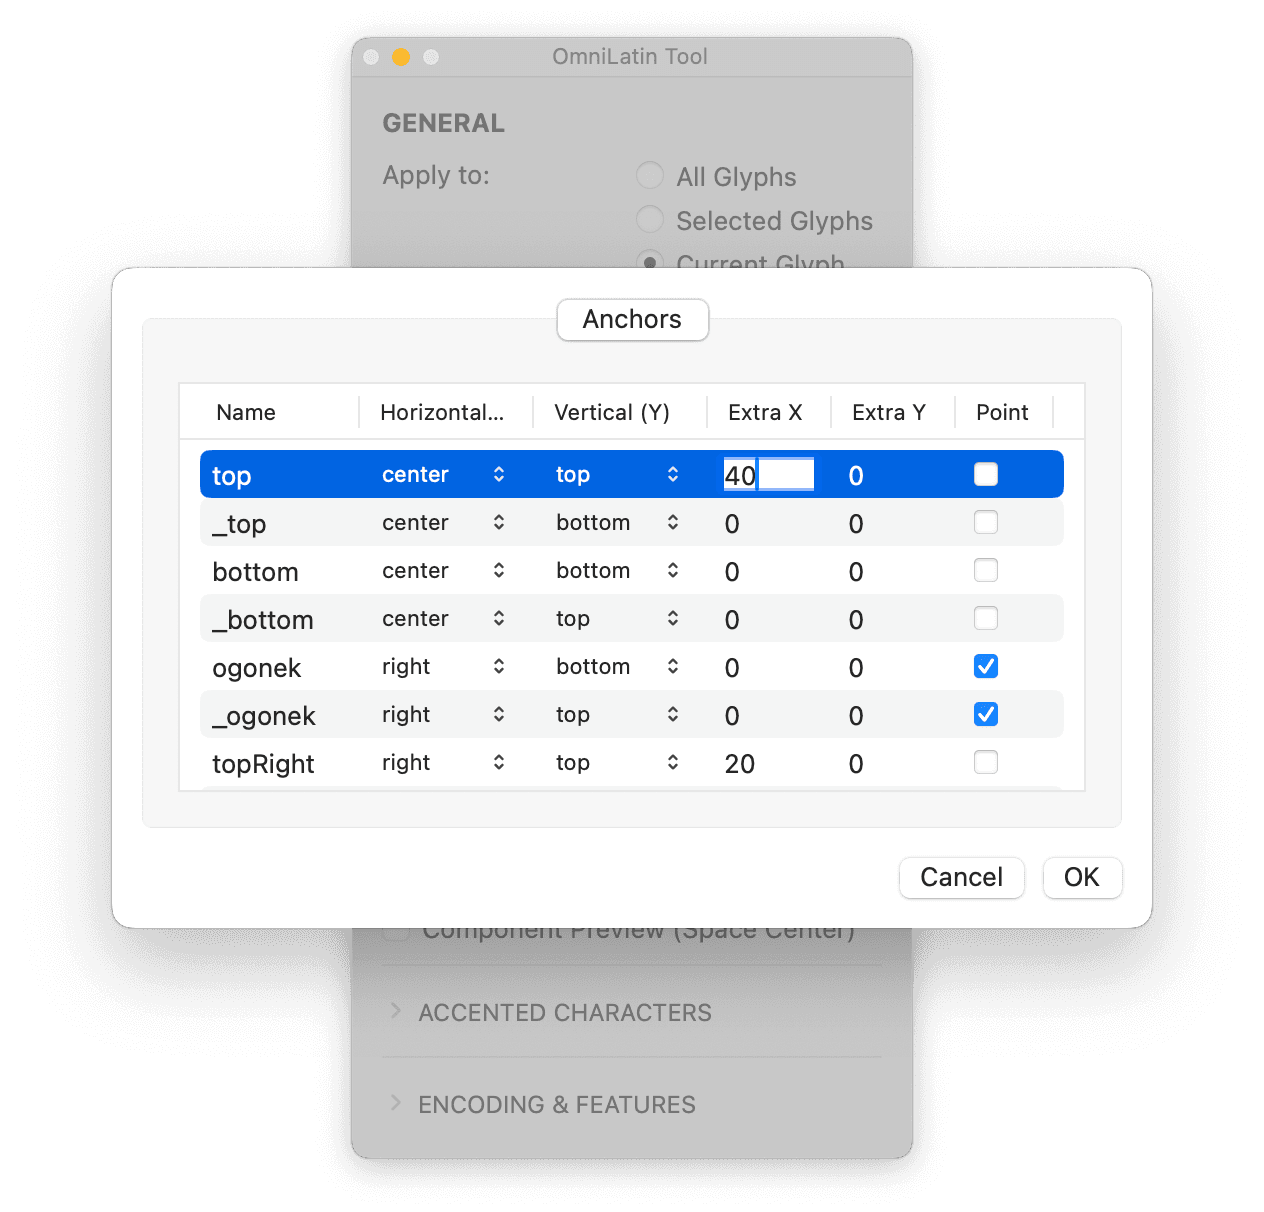
For personalized settings, click on the gear icon next to AUTOPLACE ANCHORS. You can visualize the preset settings for each anchor. Anchors can be placed on the closest vertical metrics (above or below) or on the closest extreme point coordinates (e.g.: ogonek will look for the lowest point on the right).
Enter the value of your choice to the Extra X or Extra Y coordinates to add it to the auto-placement.
Note: Make sure to press Enter to validate the value before clicking OK and closing the pop-up window.
Step five: Add the accented characters
Step five: Add the accented characters
We’re finally at the satisfying stage where you hit the button BUILD ACCENTED CHARACTERS and it fills all the precomposed characters boxes!
Most of the characters (in light blue) will be perfect as is. If not, check the placement of your anchors.
Others (in orange) might need a last touch to look at their best. We recommend you to double-check their design. The highlighted characters include the letters with ogonek or horn, that should merge smoothly and the barred/stroked characters that may need optical compensation.
Hit PASTE COMPONENTS to add the digrams, which are build from components with their respective width (in dark blue).
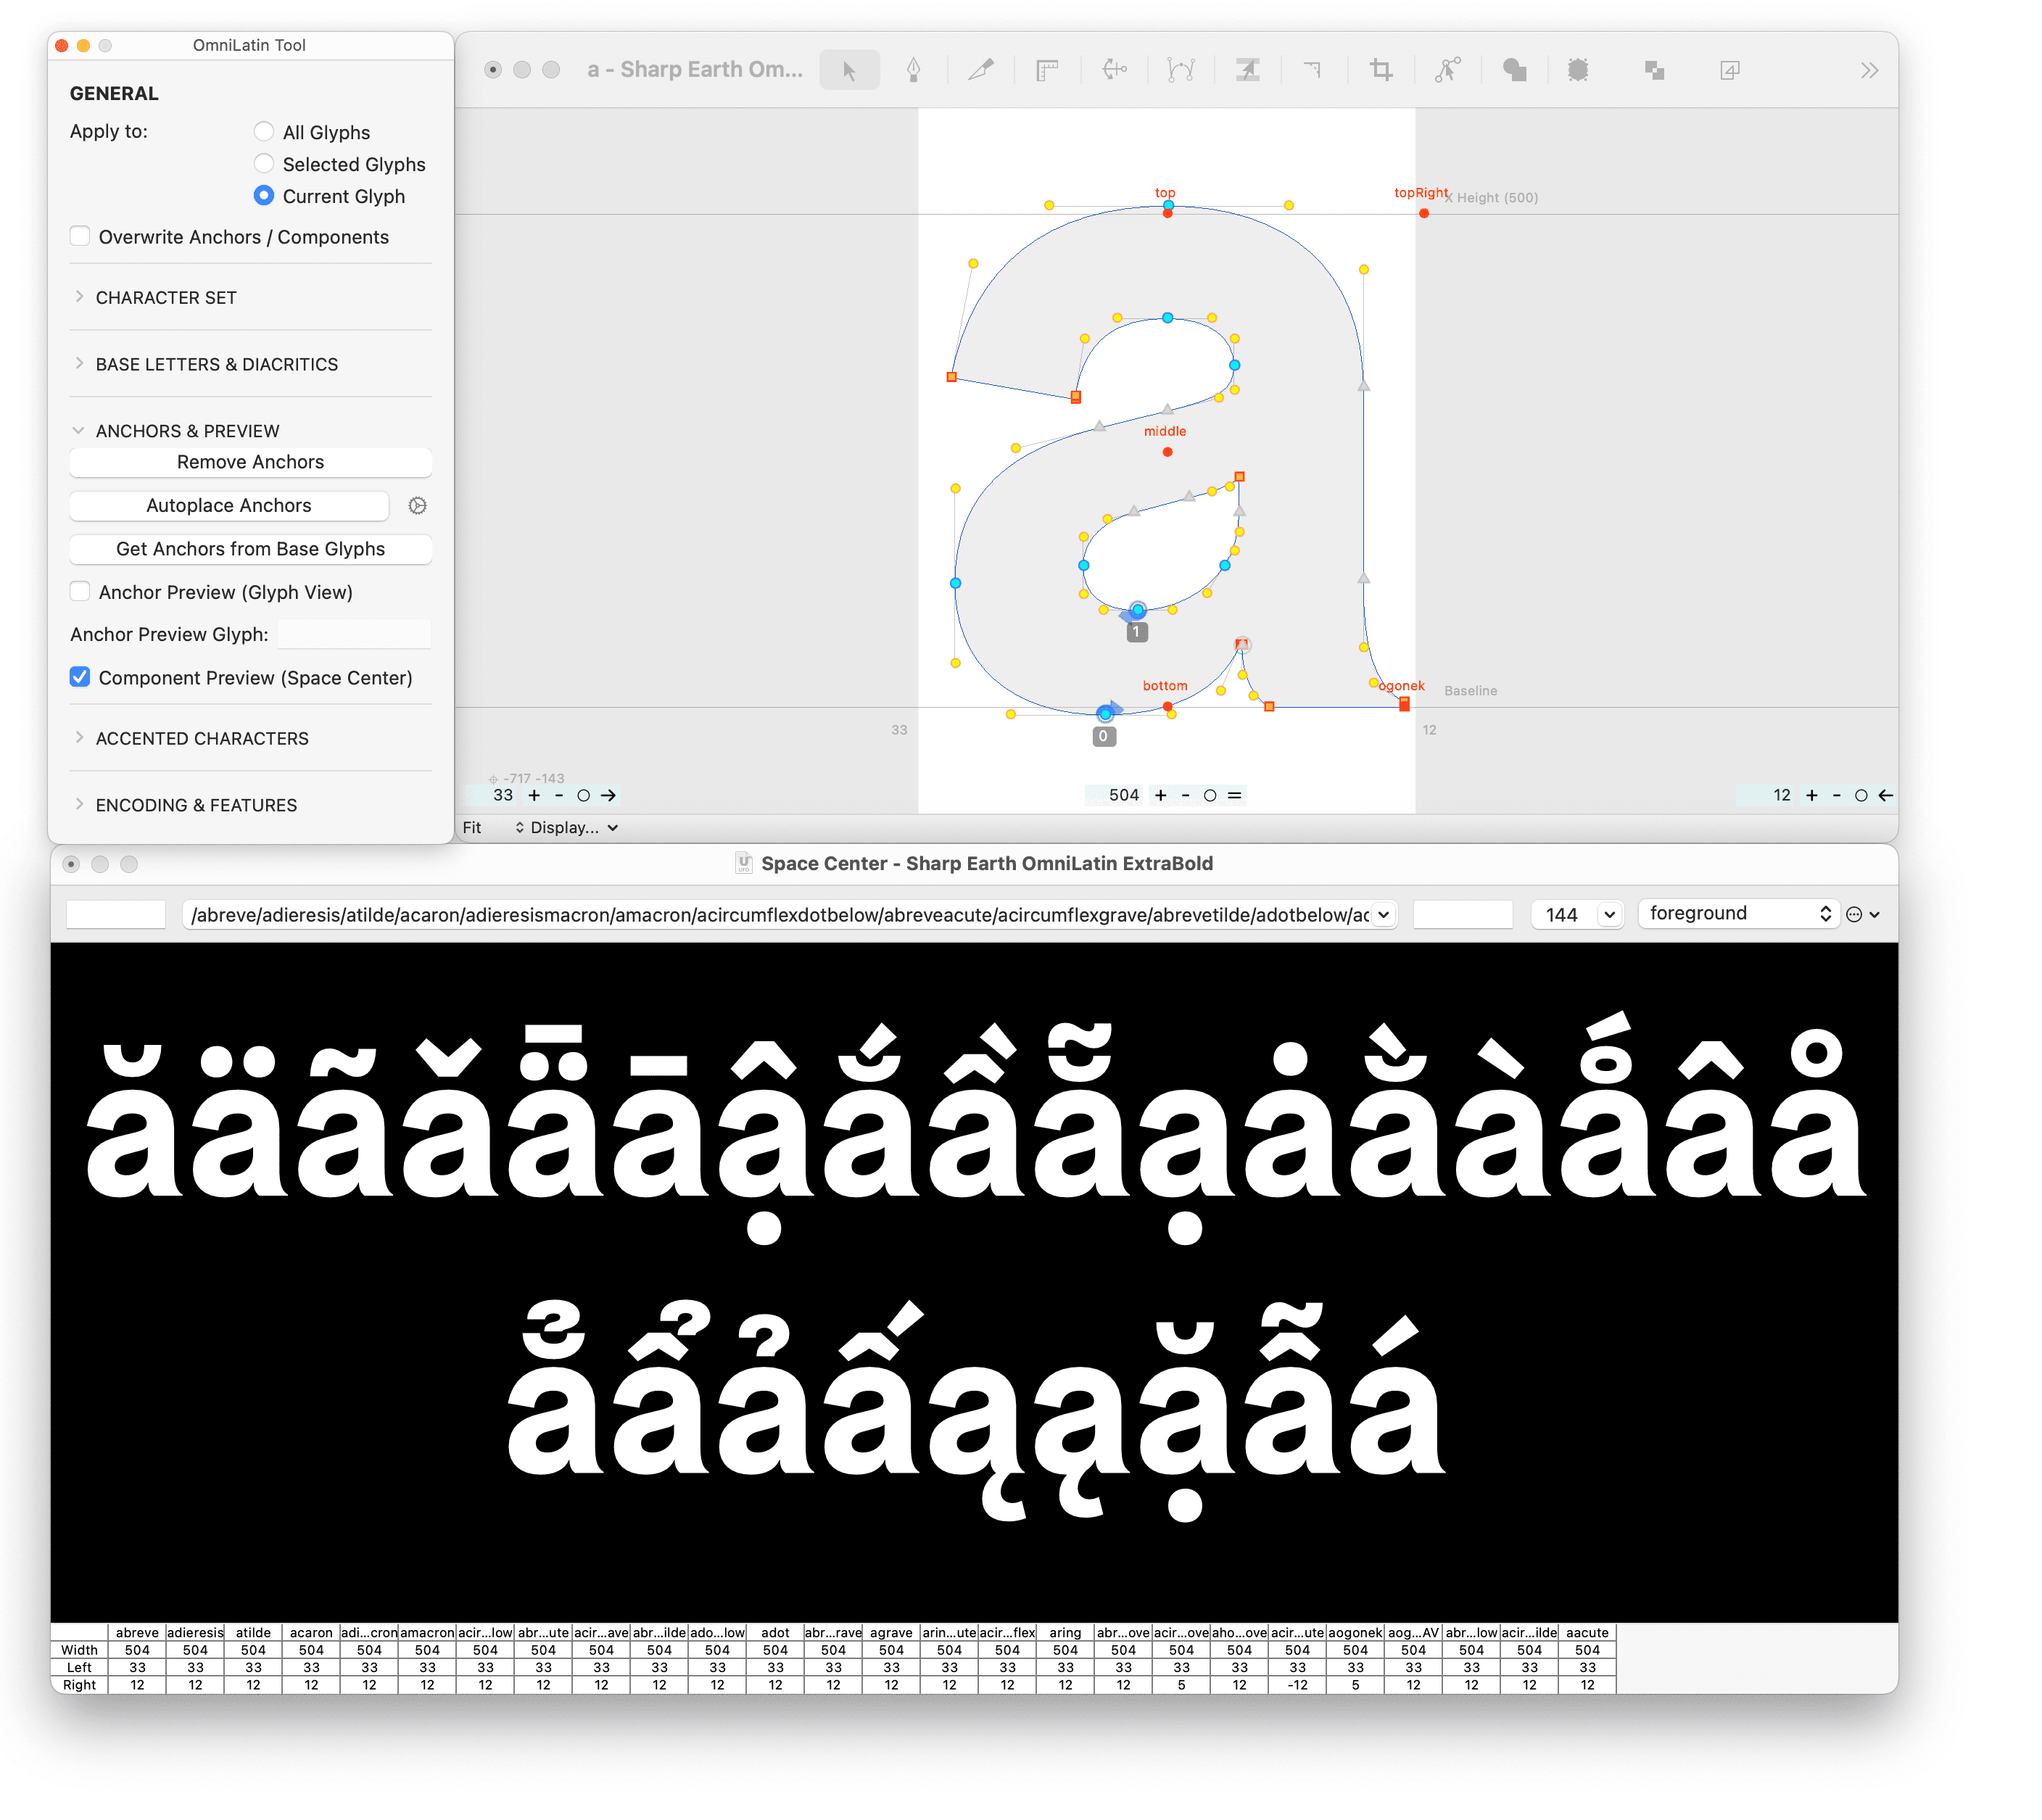
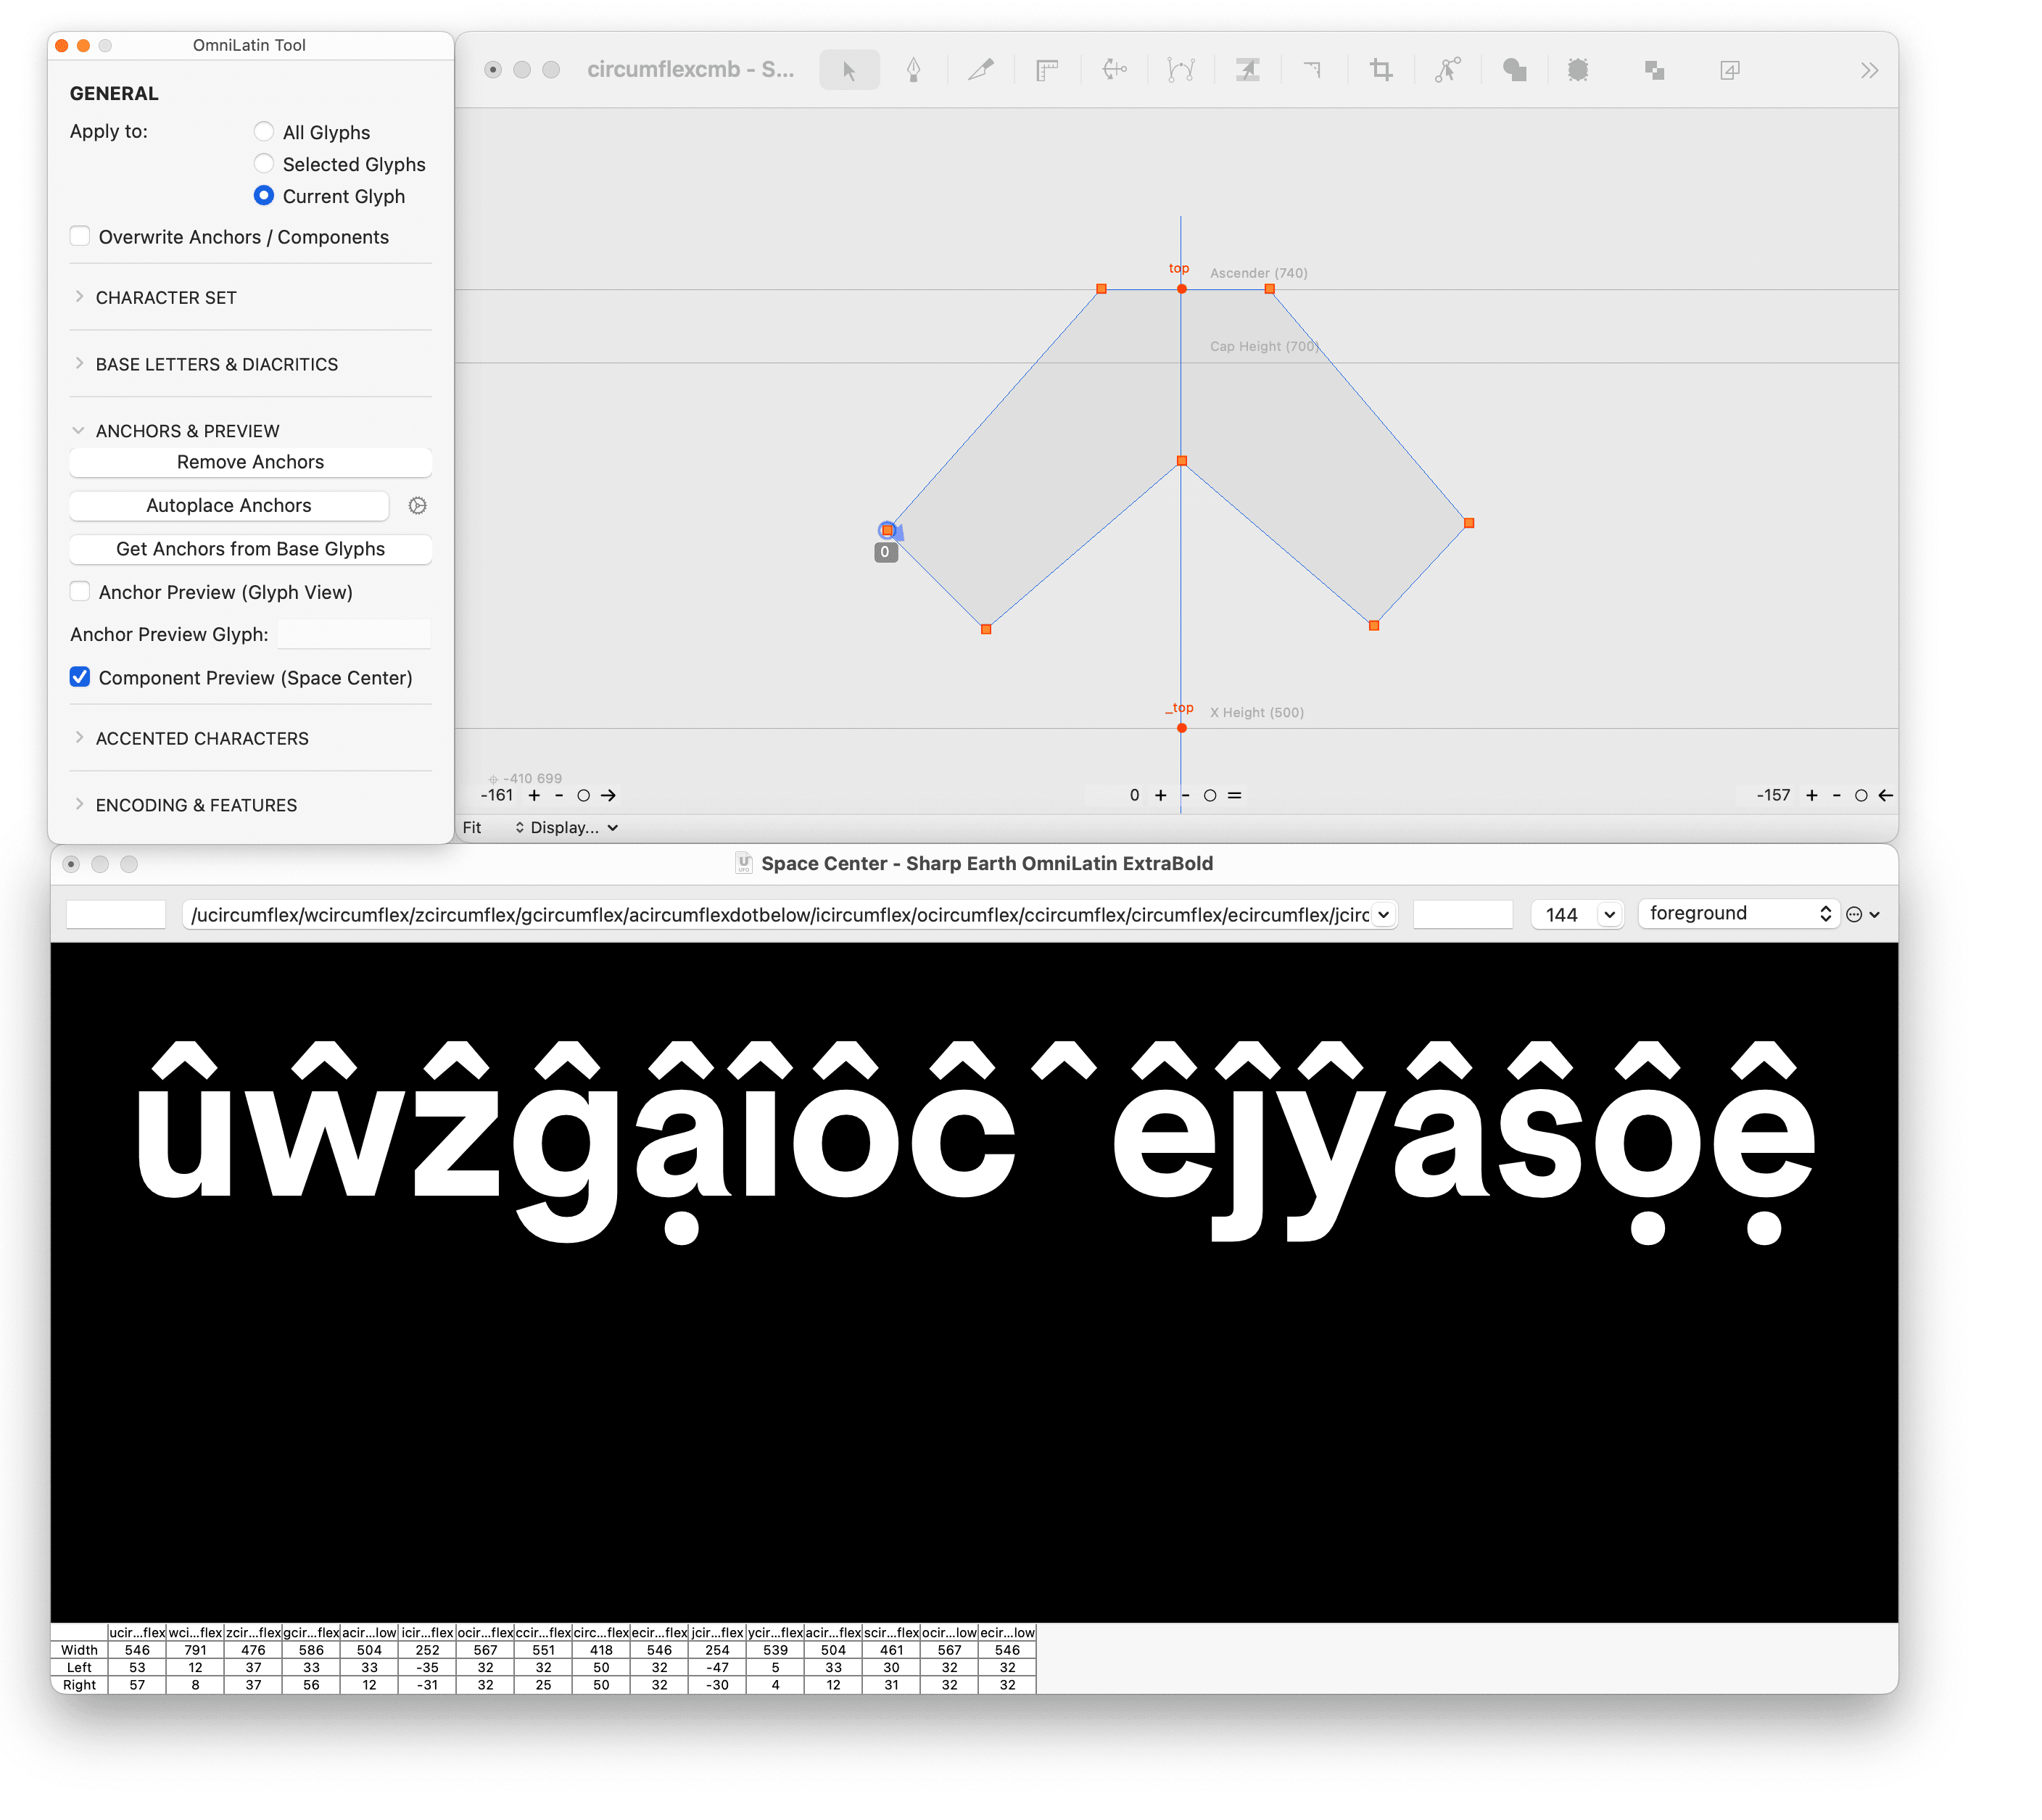
Now that all those composite letters are built you can use the COMPONENT PREVIEW (Space Center) to preview all the context were the glyph is used as component.
Step six: Add the accented characters for the alternates letters
Step six: Add the accented characters for the alternates letters
If you have alternate letters in your font, the tool will help you build their accented versions and derived special characters.
Select the alternate character(s) and use the BUILD CHARACTERS FROM ALTERNATE button. It will add the new glyphs (in pink) at the end of the character set.
Step seven: generate the font and test your OmniLatin support
Step seven: generate the font and test your OmniLatin support
In order to generate a font file with OmniLatin language support, a few more steps are required. We have regrouped them in the ENCODING & FEATURES section.
Make sure to use the FIX UNICODES function on All Glyphs.
The last step is to GENERATE THE FEATURES so that the combining mark and mark to mark systems work. Behind the scene, this button generates the combining marks list, the languagesytem list, the decomposition list, the locl feature and the cmcp feature, and writes them in the Features panel of the font. It also builds two external files: mkmk.fea and mark.fea.
Note: If you need to generate the features a second time, make sure to delete the files and features in the panel beforehand.
B́b́ Ɛ́ɛ́ Ǝ́ǝ́ Ɩ́ɩ́ Ɔ́ɔ́ Œ́œ́ Ŕŕ Ʊ́ʊ́ Ʉ́ʉ́ ʕ̓ Ã́ã́ Ẽ́ẽ́ Ɛ̃́ɛ̃́ Ĩ́ĩ́ Ɩ̃́ɩ̃́ Ṍṍ Ɔ̃́ɔ̃́ R̃́r̃́ Ṹṹ Ʋ̃́ʋ̃́ Á̹á̹ Í̹í̹ Ẹ́ẹ́ Ị́ị́ Ọ́ọ́ Ụ́ụ́ B̀b̀ Ɛ̀ɛ̀ Ə̀ə̀ Ɩ̀ɩ̀ M̀m̀ Ǹǹ Ɔ̀ɔ̀ Ʊ̀ʊ̀ Æ̀æ̀ Ɨ̀ɨ̀ Œ̀œ̀ Ã̀ã̀ Ẽ̀ẽ̀ Ɛ̃̀ɛ̃̀ Ĩ̀ĩ̀ Ɩ̃̀ɩ̃̀ Õ̀õ̀ Ɔ̃̀ɔ̃̀ Ũ̀ũ̀ Ẹ̀ẹ̀ Ọọ Ǝ̂ǝ̂ Ɛ̂ɛ̂ Ɔ̂ɔ̂ Ʊ̂ʊ̂ Ẑẑ Æ̂æ̂ Ɨ̂ɨ̂ Ø̂ø̂ Œ̂œ̂ Ḓḓ Ḽḽ Ṋṋ Ṱṱ Ɛ̈ɛ̈ Ɔ̈ɔ̈ Ŋ̈ŋ̈ N̈n̈ Ǝ̌ǝ̌ Ɛ̌ɛ̌ Ɔ̌ɔ̌ Ʊ̌ʊ̌ Ø̌ø̌ Œ̌œ̌ Č̓č̓ Q̓q̓ Q̓ʷ Ã̌ã̌ Ɛ̃̌ɛ̃̌ Ĩ̌ĩ̌ Ɔ̃̌ɔ̃̌ Ũ̌ũ̌ Ɛ̃ɛ̃ Ɔ̃ɔ̃ Ʋ̃ʋ̃ Ɩ̃ɩ̃ A̰a̰ Ḛḛ Ɛ̰ɛ̰ Ḭḭ Ɔ̰ɔ̰ Ṵṵ Ḛ́ḛ́ Ó̰ó̰ Ɔ̰̀ɔ̰̀ À̰à̰ Á̰á̰ Ɛ̰̀ɛ̰̀ Ɛ̰́ɛ̰́ Ḭ́ḭ́ Ḭ̀ḭ̀ Ɔ̰́ɔ̰́ Ṵ̀ṵ̀ Ṵ́ṵ́ Ǝ̄ǝ̄ Ɛ̄ɛ̄ Ɔ̄ɔ̄ M̄m̄ N̄n̄ Ʊ̄ʊ̄ Ǟǟ Ṅṅ Ḍḍ Ḥḥ Ḷḷ Ṛṛ Ṣṣ Ṭṭ Ẓẓ Ị́ị́ Ị̀ị̀ Ị̂ị̂ Ị̃ị̃ Ị̄ị̄ È̤è̤ Ò̤ò̤ Ô̤ô̤ Ṳ̂ṳ̂ A̧a̧ Ḑḑ Ç̌ç̌ Ȩȩ ȩ̀ȩ̀ Ȩ́ȩ́ Ȩ̂ȩ̂ Ȩ̌ȩ̌ Ɛ̧ɛ̧ Ə̧ə̧ I̧i̧ Ɨ̧ɨ̧ ɨ̧̀ɨ̧̀ ɨ̧̂ɨ̧̂ Ɨ̧̌ɨ̧̌ O̧o̧ Ɔ̧ɔ̧ U̧u̧ Ą́ą́ Ą̊ą̊ Ą̀ą̀ Ą̂ą̂ Ą̌ą̌ Ą̈ą̈ ą̈̂ą̈̂ Ą̄ą̄ Ą̄́ą̄́ Ę́ę́ Ę̀ę̀ Ę̂ę̂ Ę̌ę̌ Ę̈ę̈ Ę̈̂ę̈̂ Į́į́ Į̀į̀ Į̂į̂ Į̌į̌ Ǫ́ǫ́ Ǫ̀ǫ̀ Ǫ̂ǫ̂ Ǫ̌ǫ̌ Ų́ų́ Ų̂ų̂ Ų̌ų̌ S̨s̨ Z̨z̨ A̱a̱ Ḏḏ P̱p̱ X̱x̱ Ũ᷆ũ᷆ I᷆i᷆ I᷇i᷇ I᷅i᷅ I᷆i᷆ I̍i̍
B́b́ Ɛ́ɛ́ Ǝ́ǝ́ Ɩ́ɩ́ Ɔ́ɔ́ Œ́œ́ Ŕŕ Ʊ́ʊ́ Ʉ́ʉ́ ʕ̓ Ã́ã́ Ẽ́ẽ́ Ɛ̃́ɛ̃́ Ĩ́ĩ́ Ɩ̃́ɩ̃́ Ṍṍ Ɔ̃́ɔ̃́ R̃́r̃́ Ṹṹ Ʋ̃́ʋ̃́ Á̹á̹ Í̹í̹ Ẹ́ẹ́ Ị́ị́ Ọ́ọ́ Ụ́ụ́ B̀b̀ Ɛ̀ɛ̀ Ə̀ə̀ Ɩ̀ɩ̀ M̀m̀ Ǹǹ Ɔ̀ɔ̀ Ʊ̀ʊ̀ Æ̀æ̀ Ɨ̀ɨ̀ Œ̀œ̀ Ã̀ã̀ Ẽ̀ẽ̀ Ɛ̃̀ɛ̃̀ Ĩ̀ĩ̀ Ɩ̃̀ɩ̃̀ Õ̀õ̀ Ɔ̃̀ɔ̃̀ Ũ̀ũ̀ Ẹ̀ẹ̀ Ọọ Ǝ̂ǝ̂ Ɛ̂ɛ̂ Ɔ̂ɔ̂ Ʊ̂ʊ̂ Ẑẑ Æ̂æ̂ Ɨ̂ɨ̂ Ø̂ø̂ Œ̂œ̂ Ḓḓ Ḽḽ Ṋṋ Ṱṱ Ɛ̈ɛ̈ Ɔ̈ɔ̈ Ŋ̈ŋ̈ N̈n̈ Ǝ̌ǝ̌ Ɛ̌ɛ̌ Ɔ̌ɔ̌ Ʊ̌ʊ̌ Ø̌ø̌ Œ̌œ̌ Č̓č̓ Q̓q̓ Q̓ʷ Ã̌ã̌ Ɛ̃̌ɛ̃̌ Ĩ̌ĩ̌ Ɔ̃̌ɔ̃̌ Ũ̌ũ̌ Ɛ̃ɛ̃ Ɔ̃ɔ̃ Ʋ̃ʋ̃ Ɩ̃ɩ̃ A̰a̰ Ḛḛ Ɛ̰ɛ̰ Ḭḭ Ɔ̰ɔ̰ Ṵṵ Ḛ́ḛ́ Ó̰ó̰ Ɔ̰̀ɔ̰̀ À̰à̰ Á̰á̰ Ɛ̰̀ɛ̰̀ Ɛ̰́ɛ̰́ Ḭ́ḭ́ Ḭ̀ḭ̀ Ɔ̰́ɔ̰́ Ṵ̀ṵ̀ Ṵ́ṵ́ Ǝ̄ǝ̄ Ɛ̄ɛ̄ Ɔ̄ɔ̄ M̄m̄ N̄n̄ Ʊ̄ʊ̄ Ǟǟ Ṅṅ Ḍḍ Ḥḥ Ḷḷ Ṛṛ Ṣṣ Ṭṭ Ẓẓ Ị́ị́ Ị̀ị̀ Ị̂ị̂ Ị̃ị̃ Ị̄ị̄ A̧a̧ Ḑḑ Ç̌ç̌ Ȩȩ ȩ̀ȩ̀ Ȩ́ȩ́ Ȩ̂ȩ̂ Ȩ̌ȩ̌ Ɛ̧ɛ̧ Ə̧ə̧ I̧i̧ Ɨ̧ɨ̧ ɨ̧̀ɨ̧̀ ɨ̧̂ɨ̧̂ Ɨ̧̌ɨ̧̌ O̧o̧ Ɔ̧ɔ̧ U̧u̧ Ą́ą́ Ą̊ą̊ Ą̀ą̀ Ą̂ą̂ Ą̌ą̌ Ą̈ą̈ ą̈̂ą̈̂ Ą̄ą̄ Ą̄́ą̄́ Ę́ę́ Ę̀ę̀ Ę̂ę̂ Ę̌ę̌ Ę̈ę̈ Ę̈̂ę̈̂ Į́į́ Į̀į̀ Į̂į̂ Į̌į̌ Ǫ́ǫ́ Ǫ̀ǫ̀ Ǫ̂ǫ̂ Ǫ̌ǫ̌ Ų́ų́ Ų̂ų̂ Ų̌ų̌ S̨s̨ Z̨z̨ A̱a̱ Ḏḏ P̱p̱ X̱x̱ Ũ᷆ũ᷆ I᷆i᷆ I᷇i᷇ I᷅i᷅ I᷆i᷆ I̍i̍
Color code recap
Color code recap
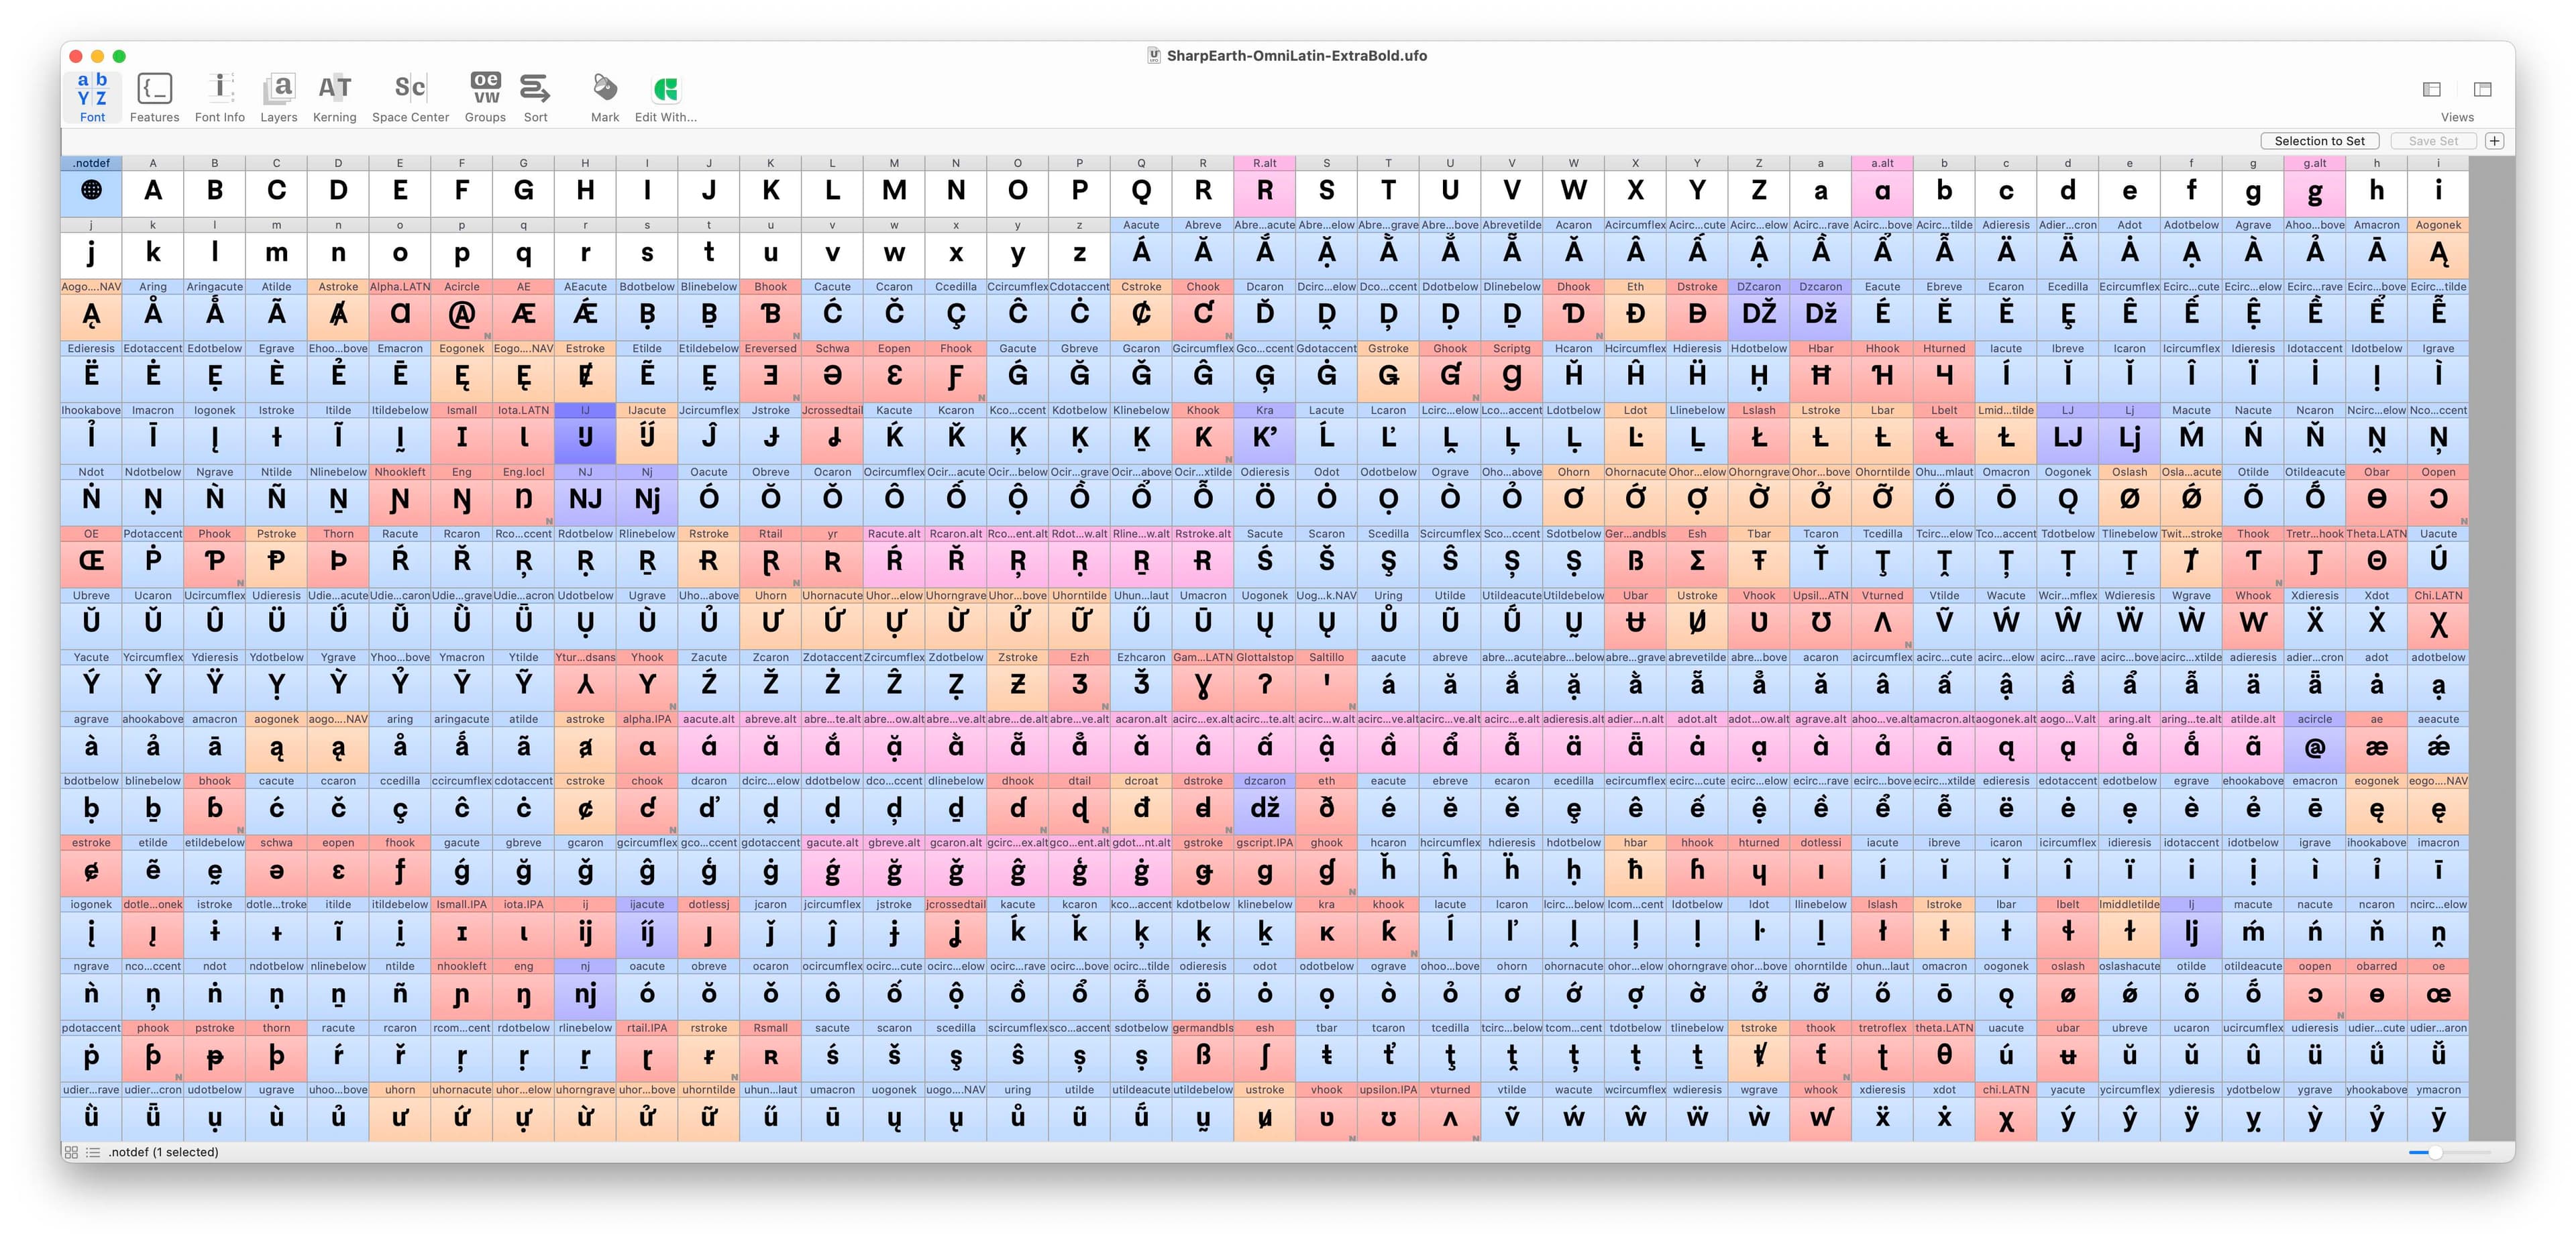
Many actions, such as Build Accented Characters will apply a special color to your glyphs boxes.
Red: you need to design it (from PREBUILD CHARATERS)
Orange: it might need some design refinement (from BUILD ACCENTED CHARACTERS)
Light Blue: should be good to go (from BUILD ACCENTED CHARACTERS)
Dark Blue: should be good to go (from PASTE COMPONENTS)
Pink: alternates characters (from BUILD CHARACTERS FROM ALTERNATE)
Sharing is caring
Sharing is caring
We decided to share the OmniLatin Tool as an open source tool because this knowledge needs to be shared and used for a better representation of all the Latin languages.
→ Read the Case Study about the OmniLatin Research
→ Watch Léna and My-Lan’s demo at Automatic Type Design 3
This extension was designed for the software RoboFont and is available on Mechanic 2 and on Github. The tool and research are always ongoing projects and we are looking forward to hear back from the type community about what we could add or improve. For example, the localized features could be expended to other languages with their specifications. We are also always looking for samples of texts in rare languages.
We invite you to pull a request on Github if you are able to contribute to this great tool! If you are interested to develop it for Glyphs App, feel free to do it.
Thank you ♥
Thank you ♥
The OmniLatin tool was co-directed by Léna Le Pommelet & My-Lan Thuong.
It was developed by Marte Verhagen, with the contribution of Calvin Kwok, My-Lan Thuong and Peter Nowell.
The OmniLatin character set is based on the research by My-Lan Thuong, Cris Hernández, Glenda Bellarosa, the Rosetta Type team (Hyperglot) and the Google team (Shaperglot).
Thank you Frederik Berlaen (RoboFont), Tal Leming (Ezui), Frank Grießhammer (Mark Feature Writer) and Petr van Blokland who inspired us with his Font Assistant.
Featured Fonts
Featured Fonts